This no-nonsense, visual, tool-light guide focuses on very small wall repair jobs—ordinary nail holes, old picture hooks, or small anchor holes—showing you exactly which materials to grab, how to use a 10-minute workflow for each wall section, what drying times to expect and how to finish with paint touch up that blends in rather than leaving bright white spots everywhere.
Scope notes: what this nail hole repair covers (and where to stop)
Before opening any spackle, it helps to be clear about which types of damage are perfect for a quick renter fix and which ones cross the line into bigger repairs that may need different products or professional help.
Holes and damage you can confidently handle with this guide
- Standard nail holes from small picture hangers, thumbtacks or lightweight nails used for calendars, posters and small frames.
- Slightly larger holes from plastic wall anchors used for shelves or heavier artwork, roughly the size of a pencil eraser or a bit bigger.
- Minor surface scuffs, scratches and shallow dents caused by furniture bumping the wall or frames rubbing when they were moved.
- Small clusters of holes in one area, such as a gallery wall of photos, provided the wall surface is otherwise solid and not crumbling.
Signs the damage may be beyond quick nail hole repair
- Cracks wider than a nail hole that run in long lines, especially around windows, doors or corners, which may indicate movement or settling.
- Soft, crumbly drywall around the hole, or any signs of moisture, staining or mold, suggesting water damage behind the paint.
- Large holes where sections of drywall are missing, big enough to insert several fingers or see inside the wall cavity.
- Plaster walls with deep holes exposing lath strips or old backing layers, which typically call for different repair methods than basic spackle.
When you see these more serious issues, the most practical and safe option for renters is usually to document them with photos, notify the landlord or property manager and avoid trying to fix structural or moisture problems on your own.
Materials checklist: tool-light wall repair kit for renters
Quick, tidy repairs do not require a full workshop; a small set of inexpensive items can handle nearly every standard nail hole and basic paint touch up.
Wall repair and filling materials
- Pre-mixed lightweight spackle or wall repair compound in a small tub or tube, chosen for interior use on drywall or plaster.
- Optional small tub of joint compound if you prefer a slower-drying, very smooth material and already have it on hand.
Application and smoothing tools (minimalist options)
- One narrow putty knife (about 2–5 cm / 1–2 inches wide) or, in a pinch, a clean old plastic card (such as a retired gift card) to spread spackle.
- Soft, lint-free cloths or paper towels for wiping edges, cleaning drips and damp-smoothing the surface before it fully dries.
- Fine-grit sandpaper (around 220 grit) or a small sanding sponge, helpful for very gentle polishing once the spackle is dry.
Paint and finishing supplies
- Leftover wall paint that matches the existing color and sheen (matte, eggshell, satin, etc.) from when the property was painted.
- Small angled paintbrush or foam brush for precise touch ups; a tiny foam roller can be useful for lightly blending on larger areas.
- Optional primer or stain-blocking primer for glossy walls or darker colors, particularly if the landlord or lease instructions recommend it.
Protection and clean-up items
- Drop cloth, old sheet or large garbage bags taped flat to protect floors or furniture below the repair area.
- Painter’s tape to mask trim edges or outlets if you are concerned about accidental paint touch up smears.
- Small container or tray for holding a bit of spackle and paint so you are not juggling large tubs near the wall.
Optional safety gear
- Dust mask for sanding, especially if you have respiratory sensitivities or are working in a small, unventilated space.
- Safety glasses to keep sanding dust or small chips out of your eyes, useful when you are looking up at higher wall sections.
10-minute workflow: how to patch nail holes from bare wall to ready-to-paint
Breaking the process into a repeatable 10-minute routine for each wall section keeps things manageable, particularly when you are working room by room before a move-out inspection.
Overview of the 10-minute nail hole repair routine
- Locate and mark nail holes you will repair in this section.
- Prep the area by removing hardware, dust and loose paint.
- Apply spackle, slightly overfilling the hole.
- Smooth the surface so the patch is nearly flush.
- Let the patch dry for the recommended time.
- Lightly sand or damp-smooth if needed.
- Finish with paint touch up once everything is fully dry.
The “10-minute” part refers to the active hands-on time for each area; drying times between steps will extend the overall project, yet you can use those gaps to move on to other tasks or patch holes in another room while the first section dries.
Step-by-step: how to patch nail holes like a renter who wants their deposit back
Step 1: Find every nail hole before you open the spackle
- Walk the room slowly with good lighting—either during daylight or with a bright lamp held near the wall—because side light makes small holes and raised paint edges much easier to see.
- Use a small piece of painter’s tape or a light pencil dot to mark each hole as you find it, which stops you from losing track once you start filling and smoothing.
- Remove any remaining nails, screws, picture hooks or plastic anchors carefully, wiggling rather than yanking, to avoid tearing off surrounding paint or drywall paper.
Step 2: Prep each nail hole so the patch sticks properly
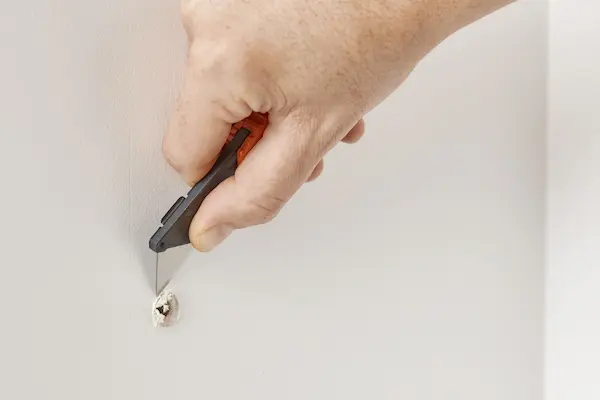
- With the tip of your putty knife or the corner of your plastic card, gently scrape around the hole to remove loose paint flakes or raised edges; aim to have a small, clean opening rather than a rough crater.
- Wipe the area with a dry cloth to remove dust; if the wall is greasy or very dirty (for example near a kitchen), a lightly damp cloth followed by a dry one helps spackle adhere better.
- For larger anchor holes, squeeze the sides gently to see if the drywall edges are crumbly; if they are, knock off loose bits, then wipe away debris so you are working with a firm surface.
Step 3: Apply spackle – small amount, correct angle, neat motion
- Scoop a small amount of spackle onto your putty knife or card, about the size of a pea for each nail hole; using too much creates extra sanding work later.
- Press the spackle into the hole firmly, moving the knife in one direction across the opening so the material fills the gap instead of just sitting on the surface.
- After the hole is filled, scrape the blade over it at a low angle (almost flat to the wall) to remove excess, leaving a thin layer that is slightly raised above the wall surface but not smeared widely around.
- For cluster areas with several holes close together, apply spackle to all of them, then smooth in overlapping strokes, so the final patch is one even, gentle mound rather than many ridges.
Step 4: Smooth the edges for minimal sanding later
- After the initial smoothing with the knife, immediately wipe around the patch edge with a finger wrapped in a slightly damp cloth, feathering the spackle into the surrounding paint.
- Keep the pressure light as you blend, because pressing too hard can pull spackle back out of the hole and force you to refill.
- Inspect the area from a shallow side angle; if you see heavy ridges or thick smears, scrape once more with the knife and lightly re-feather with the damp cloth.
Drying times: how long to wait before sanding and paint touch up
Waiting for compound to dry is the part most people underestimate, yet patience here is what separates a smooth, invisible repair from a lumpy patch that peels or cracks later.
Typical drying ranges for small nail hole repairs
- Lightweight spackle in thin layers often dries to the touch in 15–30 minutes, sometimes quicker in warm, dry rooms and slower in cool or humid conditions.
- Deeper fills, such as anchor holes or spots where you applied more compound, may need 1–2 hours to dry thoroughly, even if the surface feels firm.
- Joint compound generally takes longer than lightweight spackle and may need several hours or overnight for complete drying, depending on thickness.
Simple tests to check whether spackle is ready
- Look closely at the color: wet spackle usually appears slightly darker or more translucent, while dry material becomes lighter and uniformly matte.
- Tap gently with a fingertip; if the patch feels cool and slightly soft, it likely needs more time, whereas a room-temperature, solid feel suggests it is ready for sanding or touch up.
- Avoid pressing deeply or digging at the patch; you want to test only the surface, not disrupt it and create more repair work.
Smoothing options: light sanding versus damp cloth “polish”
When the spackle is fully dry, smoothing the surface blends your patch into the wall, and you can choose between very light sanding or a gentle damp-cloth technique depending on how much texture the wall has and how sensitive you are to dust.
Light sanding for smooth walls
- Hold a piece of fine-grit sandpaper or a sanding sponge loosely between your fingers and gently rub over the patch in small circles or long strokes that follow the wall.
- Keep pressure very light and check frequently; the goal is to remove only the slight bump, not to sand down into the drywall paper or leave a shallow depression.
- Feather your passes outward slightly into the surrounding paint so the transition from patch to wall becomes invisible to both eyes and fingertips.
- Wipe the area with a dry cloth afterwards to remove dust before paint touch up, so paint adheres well and does not pick up grit.
Damp cloth smoothing for lightly textured walls
- For walls with slight orange-peel texture or if you want to avoid dust, you can soften very thin ridges by rubbing the dry patch lightly with a barely damp cloth.
- Move in circular motions, checking as you go; this technique works best when the patch was already smoothed fairly well during the wet stage.
- Be cautious not to over-wet the area, which could soften the spackle and cause it to smear; a minimal amount of moisture is enough.
Paint touch up: blending patches so they disappear
Even perfectly filled nail holes will stand out if left as white dots, so a small amount of careful paint touch up is essential for move-out ready walls, especially in main living areas where landlords often look closely.
Matching paint color and sheen
- Use the exact leftover paint from the last wall painting whenever possible, ensuring that both the color name and sheen (matte, eggshell, satin) match what is on the wall now.
- Stir paint thoroughly before use, because pigment and sheen ingredients can separate during storage and affect the match.
- If you do not have original paint, try to locate a label on leftover cans in storage, or consider asking the landlord if they know the brand and color used.
Small-area touch up technique
- Pour a small amount of paint into a clean container rather than dipping directly into the can, which helps keep the main supply uncontaminated.
- Load a small brush with a little paint, then wipe most of it off against the container side so you are working with a semi-dry brush rather than a dripping one.
- Dab gently over the patched spot, covering the spackle completely, then feather the brush outward in light strokes so the new paint thins as it meets the old paint.
- For slightly larger repaired sections, a small foam roller rolled lightly over and slightly beyond the patch can mimic the original roller texture and help the spot blend better.
- Allow the first coat to dry fully according to the paint instructions, then assess whether a second thin coat is needed to match surrounding color and coverage.
Blending strategies when you cannot get a perfect match
- If paint color is close but not exact, keep touch ups as small as possible, confined just to the patch and its immediate area, so differences are harder to see.
- Consider repainting an entire small section, such as one narrow wall or panel, if many patches make the surface look speckled and you cannot match the old paint well.
- View the wall in both daylight and artificial light after the paint dries, since some mismatches only show under certain lighting; this helps you decide if more blending is needed.
Special cases: how to patch nail holes with anchors, in corners and on different surfaces
Not all nail holes are identical, and a few special situations call for slightly adjusted techniques while still using the same basic spackle and paint touch up toolkit.
Anchor holes and larger openings
- For plastic or metal wall anchors, twist and wiggle gently to remove them; if they will not come out cleanly, tap them just below the surface instead using a screwdriver and hammer, then treat the small depression like a larger nail hole.
- Apply spackle in two thin layers rather than one thick one: fill halfway, let it dry, then add a second layer slightly proud of the wall and smooth as usual.
- Sand lightly across a wider area to blend edges, since larger patches are easier to see if only the center is smoothed.
Corners and near-trim repairs
- When holes sit close to corners or trim, narrow the amount of spackle you apply so it does not overload the angle; work with the long edge of your tool aligned along the corner line for a crisp edge.
- Use painter’s tape on trim edges before paint touch up if you are concerned about slips, then remove tape carefully while paint is still slightly tacky for a clean line.
Different wall textures
- On smooth walls, aim for a perfectly flat patch; any bump or divot will show under side lighting, making careful smoothing particularly important.
- For lightly textured walls, match the texture by using a stippling motion with a dry brush or dabbing with a sponge while the last thin layer of spackle is still slightly soft, then paint over once dry.
- Heavy texture may require specialized spray texture or adjustment products; if a rental wall has such a finish and you are unsure, consider leaving very small nail holes as-is if the lease permits them, or consulting the landlord for preferred repair methods.
Move-out game plan: organizing wall repair so it feels manageable
Facing a whole apartment or house full of small holes can feel like too much, yet treating nail hole repair as a series of short sessions makes the work realistic even alongside packing and cleaning.
Room-by-room sequence
- Start with less personal spaces such as hallways and living rooms where larger frames or mirrors were hung; patch holes there first since these areas are often inspected closely.
- Move on to bedrooms once furniture is moved away from the walls, giving you access to all nail holes near beds, dressers and previous wall decor.
- Finish with kitchen and bathroom walls where moisture and grease may require extra cleaning before spackle and paint touch up.
Timing and drying strategy
- Plan a first pass focused solely on filling all holes with spackle, moving quickly and not worrying about paint on the same day; this allows everything to dry thoroughly overnight.
- Spend the next session on sanding or smoothing and then touch up painting, which can be faster when you work wall by wall with tools already out.
- Leave enough time before the final inspection for paint to cure and for you to spot any missed holes in different lighting.
Final inspection checklist for your own eyes
- Walk each room with blinds open and lights on, scanning walls from different angles to catch any unfilled or unpainted nail holes.
- Touch the repaired areas gently with fingertips to confirm they feel smooth and flush with surrounding paint, correcting any bumps that still feel obvious.
- Check for stray paint drops on floors, trim or outlets and wipe them away so the overall impression is tidy and cared for.