Categoria: Tech and Productivity

Straight-talk guides to apps, devices, and workflows. Quick fixes and time-saving tips that help you get more done—without the jargon or headaches.

  • Simple Automation With Shortcuts

    Simple automation with Shortcuts can turn small, repetitive iPhone tasks into effortless routines that run smoothly in the background without extra taps or thought.

    For many iPhone users who have heard about automation but never quite felt confident enough to try it, the idea of creating shortcuts that run routines for you can feel strangely magical, especially when you imagine everyday tasks happening automatically without requiring taps, swipes, or constant reminders, which is why understanding simple automation with Shortcuts can completely change the way you manage your daily flow.

    Although automation may sound technical, the best routines are often the simplest ones, and once you learn how to build a few beginner-friendly shortcuts, you’ll realize the app was designed precisely for people who want convenience rather than complexity.

    This guide walks you step-by-step through five everyday automations that work beautifully for beginners, showing you how to set them up safely, how to grant the right permissions without compromising privacy, and how to test each one so nothing surprises you.

    You’ll also pick up naming tips, troubleshooting cues, and practical examples that make it easy to extend each recipe into your own customized routines, and by the time you finish, you’ll feel comfortable experimenting with shortcuts that help mornings start smoother, work sessions feel cleaner, and evenings wind down with fewer decisions.

    Why simple automation matters for everyday iPhone users

    Automation on iOS doesn’t replace thoughtful habits, but it enhances them by removing repetitive steps that you perform dozens of times throughout the day without noticing how much mental energy they consume. When you automate tiny tasks such as muting notifications at specific times, opening certain apps when you begin work, or prepping your phone for bedtime, you create a supportive environment that runs behind the scenes.

    Reasons simple automation helps:

    • It reduces small decisions that accumulate mental fatigue.

    • It nudges your routines along even when you forget.

    • It keeps tasks consistent by removing human error.

    • It encourages calmer, more predictable rhythms.

    • It supports focus and reduces friction throughout the day.

    • It helps build structure for users who want gentle guidance rather than forceful rules.

    Although Shortcuts can build complex systems, this guide focuses on gentle, practical routines perfect for curious beginners.

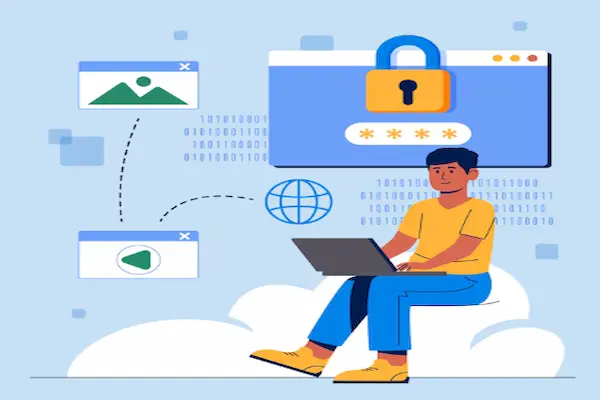
    Before you start: important privacy and safety notes

    Because some automations require permissions, iOS always asks for confirmation before allowing a shortcut to read data, run scripts, or use device features.

    Essential safety principles:

    1. Never grant permissions unless you understand what the shortcut does.

    2. Avoid shortcuts shared by strangers unless you can inspect each action inside it.

    3. Keep automations local—avoid routines that send sensitive content automatically.

    4. Review which actions request access to location, photos, notifications, or contacts.

    5. Test shortcuts manually before enabling “Run Automatically.”

    Your privacy is always more important than convenience. iOS is designed to protect you, not trip you.

    How to start building confidence in Shortcuts

    You can build confidence by first learning how actions stack together like building blocks. Each action performs a small task, and combining actions creates routines.

    Understanding foundational actions:

    • Open App

    • Set Focus

    • Set Low Power Mode

    • Get Current Weather

    • Show Alert

    • Log Health Samples

    • Play/Pause Music

    • Set Brightness

    • Set Volume

    Once you learn these basics, you can combine them into miniature workflows that do delightful, useful things.

    Five Everyday Automations Anyone Can Build

    Below are five complete beginner-friendly automations that require no advanced knowledge and rely only on native iOS features. Each is designed to save small bits of energy throughout your day.

    Automation 1: A morning “Start My Day” shortcut that prepares your phone for focus

    This automation helps you begin the day calmly by aligning your phone’s environment with your intentions, letting you start mornings without immediately stumbling into notifications or distractions.

    What it does:

    1. Turns on Low Power Mode (optional).

    2. Sets device brightness to a comfortable morning level.

    3. Activates a Focus mode such as Do Not Disturb or Work.

    4. Opens your morning apps such as Notes or Reminders.

    5. Reads the weather aloud or displays it in a small banner.

    Why this matters:

    • It reduces morning friction.

    • It prevents doom-scrolling.

    • It encourages a grounded start.

    How to build it:

    1. Open Shortcuts and tap “New Shortcut.”

    2. Name it “Start My Day.”

    3. Add actions in this order:

      • Set Brightness to around 40%.

      • Set Focus to the preferred mode.

      • Get Current Weather.

      • Show Result with temperature details.

      • Open App: Choose Notes or Reminders.

    4. Test the shortcut manually.

    5. Optional: Assign it to a Home Screen icon or Siri phrase.

    Safety note: Weather data requires location permission, which you should allow only if comfortable.

    Automation 2: A work-mode trigger that prepares your workspace instantly

    Many people waste time manually muting notifications, opening apps, or reorganizing their home screen whenever they begin work. This automation handles those steps automatically.

    What it does:

    1. Turns on your Work Focus.

    2. Opens your preferred productivity app.

    3. Sets phone volume to a low, non-disruptive level.

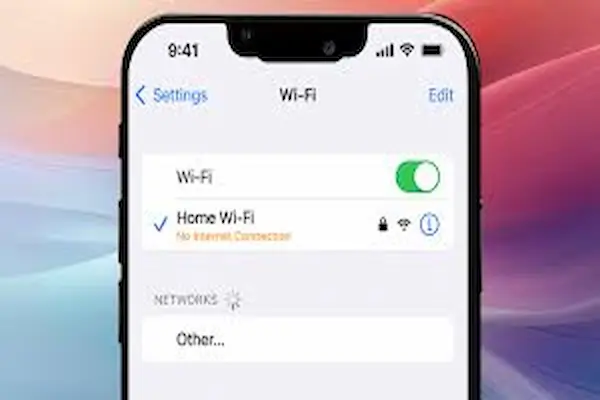
    4. Enables Wi-Fi or disables it depending on your workflow preference.

    5. Starts a timer if you use time-blocking.

    Good for:

    • Students needing quick transitions into concentration.

    • Remote workers jumping between meetings and tasks.

    • Anyone who benefits from visual or sound boundaries.

    How to build it:

    1. Create a new automation based on “App Opens” or “Time of Day.”

    2. Add these actions:

      • Set Focus to Work.

      • Set Volume to around 10–20%.

      • Open App (for example: Calendar, Notes, or a task manager).

      • Start Timer for a 25-minute focus session if helpful.

    3. Test to confirm each action fires in the correct order.

    Safety note: System settings such as Wi-Fi require user confirmation the first time.

    Automation 3: A location-based “Arrive Home” automation that sets the tone for your evening

    Your home environment often demands transitions that feel calmer and more intentional, especially after long days. This automation runs as soon as you arrive home, giving your evening a smoother start.

    What it can do:

    • Turn off Work Focus.

    • Connect to your home Wi-Fi.

    • Send a message to a partner saying you’re home.

    • Play relaxing music.

    • Set your phone to a softer brightness.

    How to create it:

    1. Start a new personal automation.

    2. Choose “Arrive” and select your home location.

    3. Add these actions:

      • Set Focus to Personal.

      • Set Brightness to 30%.

      • Play a playlist or open a favorite unwinding app.

      • Optionally send a “I’m home” message if desired.

    Why it helps:

    • Encourages healthier boundaries between work and home.

    • Delivers a sense of transition without additional steps.

    • Allows your phone to support your evening rituals.

    Safety notes:

    • Location-based triggers require allowing location access.

    • Messaging automations should require confirmation to avoid accidental sends.

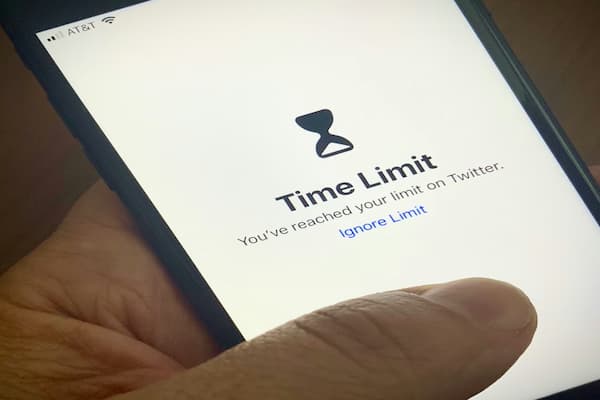
    Automation 4: A “Wind Down” bedtime automation that prepares your phone for rest

    Growing numbers of users want more restful evenings but don’t know how to keep their phones from pulling them back into stimulation late at night. This automation creates a gentle nighttime environment that encourages consistent sleep habits.

    What it can do:

    1. Turn on Sleep Focus.

    2. Dim brightness significantly.

    3. Set volume to zero.

    4. Disable notifications except for chosen contacts.

    5. Open your sleep-tracking or journaling app.

    6. Optionally remind you to plug in your device.

    How to set it up:

    1. Create a new automation triggered by “Time of Day.”

    2. Choose a time that matches your bedtime.

    3. Add actions:

      • Set Brightness to 10%.

      • Set Volume to 0%.

      • Set Focus to Sleep.

      • Open App: choose your journal or meditation app.

    4. Run it manually first to confirm everything functions smoothly.

    Why it matters:

    • Conditioning your phone for rest conditions your mind for rest.

    • It removes temptation and reduces late-night screen exposure.

    Safety note: Battery reminders require showing alerts rather than running silently.

    Automation 5: A “Share to Notes” quick-capture automation for saving ideas instantly

    Ideas often appear at inconvenient times, and many users lose good thoughts because capturing them is too slow, which is why a quick-capture shortcut solves a common problem: storing ideas instantly without navigating apps or wasting time deciding where to put them.

    What it does:

    1. Opens a text input box.

    2. Takes your typed thought or pasted snippet.

    3. Appends it to a running “Ideas” note.

    4. Displays a confirmation that the entry was saved.

    How to build it:

    1. Open Shortcuts and tap “New Shortcut.”

    2. Add “Ask for Input.”

    3. Add “Append to Note.” Select or create the Ideas note.

    4. Add “Show Notification” confirming success.

    5. Assign the shortcut to the Share Sheet for quick access.

    Good uses include:

    • Saving quotes

    • Storing tasks you think of while doing something else

    • Collecting plans, reminders, or inspirations

    • Capturing links, passages, or copied blocks of text

    Safety note: Shortcuts touching Notes require permission to access your note content.

    simple automation with shortcuts
    Additional Tips for Using Simple Automation With Shortcuts

    Although the five recipes above work immediately, deeper understanding helps you create automations that feel more personal and powerful.

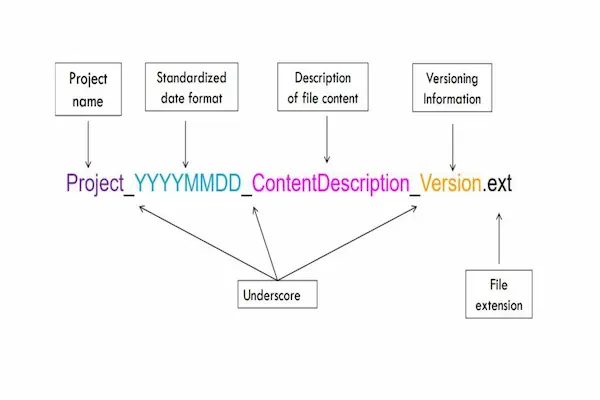
    Naming conventions for shortcuts that scale well

    Consistent naming helps you find shortcuts later, especially when you create dozens of them.

    Good naming patterns:

    • Morning_Start

    • Work_Mode_On

    • Arrive_Home_Reset

    • Evening_WindDown

    • Quick_Capture_Note

    Rules to follow:

    • Use underscores instead of spaces.

    • Keep names short and functional.

    • Group automations by purpose.

    • Avoid overly playful names that become unclear later.

    How to test automations safely before relying on them

    Testing prevents surprises and ensures each flow behaves exactly as expected.

    Steps for safe testing:

    1. Run actions manually one by one.

    2. Confirm required permissions.

    3. Use temporary data before inserting personal messages.

    4. Review the preview of each action.

    5. Test triggers such as location or time with manual override.

    6. Take notes on what feels confusing or unnecessary.

    7. Adjust the order of actions until the routine feels natural.

    Common mistakes beginners make with Shortcuts

    Avoiding these mistakes will make your automations more reliable.

    Mistakes include:

    • Overcomplicating shortcuts with too many steps.

    • Allowing shortcuts to run without understanding permissions.

    • Forgetting that some automations require tapping “Run.”

    • Relying on unstable triggers like inconsistent Wi-Fi.

    • Creating routines that try to do too much at once.

    Fixing these early helps you enjoy automation instead of wrestling with it.

    A maintenance routine for your shortcuts

    As your collection of shortcuts grows, maintenance keeps everything tidy.

    Weekly:

    • Review which shortcuts you actually used.

    • Remove shortcuts that add friction.

    • Test the most important routines for reliability.

    Monthly:

    1. Rename confusing shortcuts.

    2. Update old workflows with simpler actions.

    3. Archive unused automations into a folder.

    4. Check which workflows require new permissions.

    Quarterly:

    • Reevaluate your routines based on life changes.

    • Add new automations for changing seasons or habits.

    • Update safety or privacy settings.

    Final Thoughts

    Once you understand the basics of simple automation with Shortcuts, you begin to see how easily your iPhone can support your everyday life by automating tiny routines that would otherwise steal time, attention, and energy throughout the day. By building a morning shortcut that sets your focus, a work-mode routine that strengthens concentration, a home arrival reset that transitions you into rest, a wind-down ritual that preps your evening, and a quick-capture shortcut that preserves ideas instantly, you create a small but powerful system that runs quietly behind the scenes. The more familiar you become with these building blocks, the easier it becomes to expand them, refine them, and personalize them until your phone feels like a helpful assistant rather than another source of friction. With consistent safety checks, clear permissions, and a willingness to experiment, you will discover that even simple automation can shape calmer days, smoother rhythms, and a more intentional digital life.

  • How to Back Up Photos

    Backing up your photos becomes far less overwhelming once you follow a clear, family-friendly 3-2-1 plan designed to keep your memories safe.

    There comes a moment for almost every parent when the fear of losing irreplaceable family photos becomes very real, particularly when years of birthdays, vacations, school events, and countless everyday moments sit scattered across phones, computers, tablets, and old memory cards that haven’t been checked in ages, and although technology feels convenient, it does not guarantee safety unless you intentionally build a reliable system that protects these memories from loss, damage, or accidental deletion.

    That is precisely why understanding how to back up photos using a simple, repeatable, risk-aware plan helps ensure that nothing precious disappears unexpectedly due to hardware failure, theft, water damage, account issues, or simple human error.

    This guide explains the widely respected 3-2-1 photo backup strategy, showing you how to apply it to family photo collections without relying on any particular brand or ecosystem. By the time you reach the end, you will understand how to organize your files, where to store copies, how to verify backups, and how to maintain the system as your library grows, all in plain, vendor-neutral language designed for busy parents who want clarity rather than complexity.

    Why photo backups matter so much more than people realize

    Many families assume their photos are safe simply because they are “in the cloud” or “on the phone,” but these assumptions often fail due to overlooked risks. Understanding these risks helps clarify why a structured backup plan is essential.

    Major risks include:

    • Phones becoming lost, stolen, or dropped.

    • Computers failing suddenly due to hardware problems.

    • Accidental deletions that sync instantly and permanently.

    • Cloud account lockouts, forgotten passwords, or expired storage plans.

    • Children deleting photos accidentally while exploring devices.

    • Natural disasters such as fires or floods that destroy physical drives.

    • Memory cards or external drives becoming corrupt without warning.

    Because losing photos is emotionally devastating, adopting a proper system protects your memories even when technology misbehaves.

    Understanding the 3-2-1 photo backup strategy

    The 3-2-1 rule is considered one of the safest, most reliable backup principles across all fields of digital preservation. It is simple, flexible, and easy to maintain once you understand the structure.

    The 3-2-1 rule means:

    1. Three total copies of your photos
      The original plus two additional backups.

    2. Two different storage types
      This prevents one type of failure from deleting everything.

    3. One copy stored off-site
      This protects against physical loss such as fire, theft, or device failure.

    A quick overview:

    • Copy 1: Your everyday device (phone or computer).

    • Copy 2: External physical backup (drive, USB, or home server).

    • Copy 3: Off-site or cloud backup.

    This structure ensures that even if one system fails, your memories remain safe elsewhere.

    Designing a simple 3-2-1 plan for your family photos

    To make the rule practical, you need a personalized version that matches your devices, your habits, and the size of your photo library.

    A structured plan looks like this:

    Copy 1: A central library for all photos

    • Choose one device (computer or external drive) as the main library.

    • Move all photos from phones, tablets, and memory cards into monthly folders.

    • Avoid spreading photos across multiple devices.

    Copy 2: A physical backup inside your home

    • Use an external drive, a USB drive with enough capacity, or a home storage device.

    • Set a recurring schedule to update it weekly or monthly.

    • Store it away from heat, moisture, and dust.

    Copy 3: An off-site or cloud backup

    • Choose a cloud storage provider, or use a second external drive stored at a different location.

    • Ensure the backup runs regularly.

    • Keep account access details somewhere safe.

    The combination of these three layers gives your collection long-term durability.

    Building a strong primary photo library (Copy 1)

    Before backing up, you need a single, organized location where your photos actually live. Without this, backups become inconsistent.

    Steps to build your primary library:

    1. Gather all your photos from every device.

    2. Move them into a computer folder named “Photo Library.”

    3. Organize them by year, then by month or event.

    4. Delete duplicates only after verifying they are safe to remove.

    5. Maintain your library weekly or monthly to avoid buildup.

    Optional organizational ideas:

    • Use a year-month folder structure (2024-03, 2024-04).

    • Use event folders (2024-03_Birthday, 2024-07_Vacation).

    • Add a text file describing special events if helpful.

    This library becomes your single source of truth.

    Creating the second copy: physical at-home backup

    Your second copy must live on a physical device located in your home but separate from your daily devices for safety.

    Common physical backup types:

    • External hard drives

    • External SSDs

    • USB flash drives (for smaller photo libraries)

    • Home network storage devices

    • Large-capacity memory cards (as temporary solutions)

    Best practices for the second copy:

    • Label your drive with a date and purpose.

    • Use a straightforward folder naming system.

    • Keep the drive unplugged when not actively backing up to reduce risk of corruption.

    • Store it in a safe location such as a drawer or cabinet.

    • Avoid leaving it near heat sources or in direct sunlight.

    Important caution:

    • Do not rely on only one physical drive, because all drives eventually fail.

    Your goal is simply to create a durable, easy-to-update local backup.

    Creating the third copy: off-site or cloud backup

    The third copy is what protects you if something happens to your home devices. It is the safety net that ensures your memories survive worst-case scenarios.

    Off-site options include:

    • Cloud storage

    • A second external drive stored at a relative’s house

    • A small drive kept in a safe deposit box

    • A storage location at work (if allowed)

    Advantages of cloud-based off-site storage:

    • Files stay protected even if your home drive fails.

    • Many services offer automatic syncing.

    • You can access your photos from different devices.

    • Storage capacity can grow over time as your library increases.

    Advantages of physical off-site storage:

    • No account management.

    • No monthly fees.

    • Complete privacy.

    • Works without an internet connection.

    Your third copy should provide peace of mind for disasters, not convenience.

    How to run a regular photo backup routine

    Creating a backup system matters—but maintaining it matters even more. A routine protects you from slowly drifting into clutter again.

    Weekly tasks:

    • Move new photos from your phone to your primary library.

    • Run an external drive backup.

    • Delete blurry or accidental shots.

    • Verify that cloud sync shows your newest photos.

    Monthly tasks:

    1. Review the entire month’s photos for duplicates.

    2. Update event folders if necessary.

    3. Confirm that all three copies contain the same new images.

    4. Check that both local drive and cloud storage have enough space.

    Quarterly tasks:

    • Review long-term organization (e.g., too many event folders).

    • Update naming conventions if needed.

    • Archive physical drives older than one year.

    • Double-check that off-site storage remains accessible.

    Yearly tasks:

    • Create a full annual archive folder.

    • Start a fresh drive if your current one is aging.

    • Confirm your cloud plan still fits your storage needs.

    This routine keeps your backup system healthy.

    how to back up photos

    A simple plan diagram (text version)

    Below is a WordPress-friendly, text-only diagram of the 3-2-1 system.

    [Primary Photo Library]
    |
    |
    Copies To:
    |
    -----------------------------------------
    | |
    [At-Home Backup] [Off-Site Backup]
    (External Drive / SSD) (Cloud / Second Drive Elsewhere)

    This diagram captures the structure without relying on images.

    How to migrate years of scattered photos into a clean system

    Many families hesitate to start backups because their photos are scattered everywhere. The process becomes far easier when broken into stages.

    Stage 1: Collect everything

    • Gather phones old and new.

    • Import photos from memory cards.

    • Transfer pictures from tablets, email accounts, messages, and old drives.

    Stage 2: Sort large batches

    1. Create year folders.

    2. Drop photos roughly into the right year based on metadata.

    3. Avoid deleting anything yet.

    Stage 3: Remove giant clumps of junk

    • Screenshots with text

    • Multiple near-identical shots

    • Accidental pocket photos

    Stage 4: Begin monthly or event folders

    • Use a year-month format.

    • Move files slowly and carefully.

    Stage 5: Establish backups for the new structure

    • Apply the 3-2-1 method to the cleaned library.

    Over time, the entire scattered collection becomes organized and protected.

    Naming conventions for cleaner long-term archives

    Consistent naming improves searchability, especially when your library grows into tens of thousands of photos.

    Reliable naming patterns:

    • YYYY-MM-DD_EventName_001.jpg

    • 2024-07-18_BeachTrip_027.jpg

    • 2023-12-25_ChristmasMorning_014.jpg

    Rules to follow:

    • Always start with the date for proper sorting.

    • Use underscores, not spaces.

    • Avoid special characters.

    • Keep names short.

    • Use three-digit sequence numbers.

    Naming conventions also help future-proof your library.

    How to verify that your backups are actually working

    Backups fail silently more often than people expect. Verification ensures your copies are safe.

    Verification checklist:

    • Confirm that the newest photos appear in all three locations.

    • Open random files to ensure none are corrupted.

    • Check file counts in each location.

    • Compare folder sizes to ensure consistency.

    • Review your drive’s “last updated” date.

    • Confirm that cloud storage shows successful syncing.

    Verification takes minutes yet prevents devastating surprises later.

    Common mistakes to avoid when backing up photos

    Understanding what not to do is as important as knowing the right steps.

    Mistakes include:

    • Relying only on a phone and calling it a “backup.”

    • Storing all copies on devices kept in the same room.

    • Trusting a single external drive for years.

    • Forgetting passwords to cloud accounts.

    • Assuming cloud storage replaces the need for local copies.

    • Using memory cards as permanent storage.

    • Keeping multiple messy libraries in different places.

    Good systems avoid these pitfalls by design.

    A quick-start checklist for busy parents

    This checklist condenses the entire guide into a small, actionable plan.

    Weekly

    • Transfer photos from your phone.

    • Update local external drive backup.

    • Confirm cloud sync finished.

    Monthly

    1. Sort the newest folder.

    2. Remove duplicates.

    3. Verify all three copies exist.

    Quarterly

    • Review storage space.

    • Update folder structure.

    • Confirm off-site drive access.

    Yearly

    • Create an annual archive file.

    • Replace aging drives if necessary.

    This checklist keeps your backup plan healthy even during busy seasons.

    Final thoughts

    Once you understand how to back up photos using the 3-2-1 method, you begin to see that protecting your family memories is not a complicated technical chore but a practical, repeatable routine that only requires a few minutes each week and a well-designed set of habits that safeguard the images you cherish most. When you create three copies using different storage types and maintain at least one off-site version, you eliminate nearly every major risk of photo loss, from device failure to accidental deletion and even household emergencies. Over time, this system becomes second nature, allowing you to enjoy your photos with confidence, knowing they are preserved, protected, and ready to revisit whenever you want.

  • Browser Tabs Management Strategies

    Managing too many tabs becomes far easier once you adopt clear browser tabs management strategies that keep your screen organized and your mind focused.

    There comes a moment for nearly everyone who works online when the number of browser tabs quietly multiplying across multiple windows begins to feel less like a helpful archive of ideas and more like a swarm of tiny obligations competing for attention, and although keeping tabs open can feel like a form of productivity, the clutter eventually slows the mind, drains focus, and makes it harder to return to important tasks without feeling overwhelmed.

    Many research-heavy workers, especially those juggling multiple clients, projects, articles, or learning resources, reach a breaking point where tab overload becomes a daily source of stress rather than a convenience, and this is precisely why adopting clear and realistic browser tabs management strategies helps regain control of both time and mental space.

    This guide walks through practical, tool-agnostic methods that simplify your digital workspace so that your browser supports your work instead of scattering it. You will find three complete strategies, small habit shifts, extension ideas, organizational routines, mental models, and editor-tested tips designed to make your browsing calmer, more focused, and easier to restart day after day.

    Because the goal is not perfection but relief, you will learn how to reduce clutter without disrupting your work style, how to store information without relying on endless tabs, and how to build a repeatable system that prevents overload before it happens.

    Why tab overload drains focus and slows productivity

    Most people underestimate the cognitive load created by too many open tabs, since the clutter tends to accumulate slowly, one research session at a time, until the browser no longer feels like a workspace but a maze where important information hides behind layers of semi-important distractions. A high tab count harms productivity because:

    • The brain must constantly remember where key information lives.

    • Visual clutter reduces concentration even when tabs are not actively used.

    • Tabs make it easy to jump between tasks, increasing context-switching.

    • It becomes harder to know what is essential and what can be closed.

    • The computer slows as memory usage spikes, creating friction.

    • Anxiety rises when unfinished items fill the top of the screen.

    With deliberate browser tabs management strategies, your concentration improves because the digital environment becomes calmer, clearer, and easier to navigate during long research sessions or busy workweeks.

    The principles behind effective browser tabs management strategies

    Before exploring systems, understanding a few foundational principles makes everything easier. These principles explain why some habits work well long term and why others fail immediately.

    Core principles include:

    1. Tabs represent decisions, not storage, so leaving too many open creates a mental backlog.

    2. Your browser should support your work rhythm, not dictate it.

    3. A tab becomes clutter when you no longer remember why you opened it.

    4. Systems must be fast to use, because slow systems get abandoned.

    5. Separation of research, reading, and task execution prevents overload.

    6. Your future self should understand the system without effort.

    When these principles guide your habits, your browser becomes lighter and easier to manage across long projects or client work.

    Strategy 1: The Three-Layer System (Active, Parking, Archive)

    The first of the three main browser tabs management strategies organizes tabs by intent rather than topic, making it easier to sort what matters now versus what matters later. This method helps people whose tabs represent a mix of tasks, research, and random reading.

    How the system works

    You maintain three layers:

    1. Active Layer
      Only the tabs you are actively using today.

    2. Parking Layer
      Tabs you intend to revisit soon but do not need open right this moment.

    3. Archive Layer
      Pages you want to store as reference without keeping them visible.

    Each layer has specific rules that reduce friction.

    Active Layer rules

    • Keep this set very small, ideally under six tabs.

    • Open only what directly supports the current task.

    • Close anything irrelevant as soon as you catch yourself ignoring it.

    • Avoid more than one window unless absolutely necessary.

    Parking Layer techniques

    Because parking layers act like holding zones, they prevent fear-of-closing. Options include:

    • Use a blank notes file to paste titles and descriptions.

    • Create a dedicated “Later Today” list in a simple text document.

    • Use a browser feature that saves a window without keeping it open.

    • Group parked tabs in a separate window and minimize it.

    What matters is that tabs move out of sight but remain accessible.

    Archive Layer strategy

    Archiving ensures long-term reference items do not clog your daily workspace.

    Ideas include:

    • A folder of links sorted by project.

    • A text file with permanently useful resources.

    • Bookmarks organized by category.

    • A monthly review that cleans and updates the archive.

    This system works because it creates clear intent categories, helping your brain instantly understand where each tab belongs.

    Strategy 2: The Topic Cluster Method (Group, Label, Rotate)

    Workers who conduct deep research on many topics often feel lost when a hundred tabs all relate to similar themes, so this method organizes tabs around topic groups rather than time-based intent.

    Step 1: Group your tabs by clusters

    Examples of clusters include:

    • Client A materials

    • Client B tasks

    • Personal research

    • Learning resources

    • Admin and banking

    • Shopping and errands

    • Ideas and inspirations

    Instead of a long ribbon of mixed tabs, each cluster becomes its own window or tab group, making it easier to understand which context you are working in.

    Step 2: Label each window or group

    Because topic labels make switching between clusters feel calmer, consider labels such as:

    • Writing

    • Planning

    • Research

    • Editing

    • Personal

    • Financial

    • Admin

    A labeled environment keeps focus aligned with the task.

    Step 3: Rotate clusters deliberately

    Rotating clusters prevents burnout and ensures each topic receives appropriate attention.

    Cluster rotation principles:

    1. Work in one cluster for at least 25–50 minutes.

    2. Close or archive clusters once finished with a project block.

    3. Avoid toggling clusters too frequently, since rapid switching drains energy.

    This strategy suits people who prefer to visually separate tasks.

    Strategy 3: The Scheduled Tab Reset (Daily, Weekly, Monthly)

    This third method focuses on timed resets rather than continuous organization. It helps research-heavy workers who accumulate many tabs throughout the day and need predictable cleanup cycles.

    Daily reset

    A daily reset avoids overwhelm and takes only a few minutes.

    Daily tasks include:

    • Close tabs you no longer remember opening.

    • Move ongoing research to a folder, document, or notes page.

    • Reduce active tabs to a small core set for the next morning.

    • Save any important long reads to a dedicated reading list.

    Weekly reset

    Your weekly reset provides deeper cleanup.

    Weekly tasks include:

    1. Review all opened windows and decide which tabs belong in archives.

    2. Consolidate tabs related to the same project.

    3. Delete any duplicates or abandoned research.

    4. Organize bookmarks by theme.

    5. Export all temporary notes into permanent project folders.

    Monthly reset

    The monthly reset refreshes your entire system.

    Monthly tasks include:

    • Evaluate whether your naming or grouping structure still works.

    • Remove outdated bookmarks.

    • Review saved reading lists for relevance.

    • Clean your browser’s home page.

    • Update cluster labels for current projects.

    Because resets happen on a schedule, there is no daily pressure to keep tabs perfectly tidy.

    Habits that reduce tab overload naturally

    Systems work better when supported by habits that conserve attention.

    Helpful habits include:

    • Open tabs intentionally instead of reactively.

    • Close a tab when you finish the task it represents.

    • Avoid opening multiple versions of the same resource.

    • Use the search bar instead of keeping everything open.

    • Move research into documents immediately instead of saving tabs indefinitely.

    • Capture ideas in a central notes file rather than leaving tabs as reminders.

    • Use one window per workflow to maintain a sense of boundaries.

    • Bookmark recurring resources instead of reopening them through search.

    Even simple habits help reduce tab clutter.

    browser tabs management strategies

    Small behavioral shifts that prevent overload before it starts

    Beyond obvious habits, subtle mental shifts can transform how tabs appear in your life.

    Behavioral shifts include:

    1. Treat tabs as temporary tools, not permanent storage.

    2. View tab count as an indicator of focus, not productivity.

    3. Recognize that a tab you never return to is a tab you never needed.

    4. Stop using tabs to hold decisions, since this creates pressure.

    5. Sort tabs by purpose instead of urgency, since urgency changes daily.

    6. Limit the number of new tabs you open per hour, creating awareness.

    These small shifts dramatically reduce cognitive load.

    Extension options for managing tabs (tool-agnostic suggestions)

    Even though this guide remains tool-agnostic, many browsers support lightweight extensions that can simplify tab management without locking you into a particular ecosystem.

    Common extension types include:

    • Tab grouping tools

    • One-click tab hibernators

    • Session savers that store collections of tabs

    • Read-later tools that isolate long articles

    • Duplicate tab detectors

    • Minimalist new-tab page organizers

    • Quick-note tools that let you save ideas instead of keeping tabs open

    When choosing tools, focus on simplicity and reliability.

    Editor-tested micro-techniques that instantly reduce tab stress

    During testing, a handful of techniques consistently produced immediate relief.

    Techniques include:

    1. Pin essential tabs, such as your project dashboard or email.

    2. Use keyboard shortcuts to switch tabs faster.

    3. Place your most important tabs on the far left so they do not get buried.

    4. Limit each window to one major theme to reduce context-switching.

    5. Stack related tabs vertically, if your browser allows a vertical layout.

    6. Open new tabs in unread mode so they are easier to identify and close later.

    7. Close search results once you’ve found your answer, instead of leaving them open.

    8. Avoid mixing work and personal browsing within the same workspace.

    Each technique helps reduce the sense of clutter and keeps your brain centered.

    A complete example workflow combining all three strategies

    Below is a full hybrid system that incorporates the three main browser tabs management strategies.

    Step 1: Start your day with the Active Layer (Strategy 1)

    • Open only the essentials for today’s work.

    • Keep fewer than six active tabs.

    Step 2: Create topic clusters for deep work (Strategy 2)

    • Use clusters for research, planning, or client tasks.

    • Label groups for easier mental boundaries.

    Step 3: Save everything else to the parking layer (Strategy 1)

    • Move long reads and side ideas out of sight.

    Step 4: At the end of the day, run the Daily Reset (Strategy 3)

    • Close what no longer matters.

    • Move important items to your archive.

    Step 5: Every Friday, run a Weekly Reset (Strategy 3)

    • Consolidate research.

    • Clean bookmarks.

    • Archive or delete old clusters.

    Step 6: Monthly, reflect and adjust habits

    • Remove abandoned folders or read-later lists.

    • Refresh your system so it feels light and manageable.

    This integrated workflow remains sustainable even during heavy workloads.

    A long list of additional tab-management tricks for advanced users

    To give you maximum flexibility, here are more ideas you can add to your system.

    Ideas include:

    • Dedicate one window to tasks you revisit several times a day.

    • Use separate browsers for personal and professional tasks.

    • Keep a tiny “scratchpad” document always open for quick notes.

    • If you routinely open too many research tabs, set a tab-limit rule.

    • Sort tabs by importance instead of recency.

    • Use a dedicated browser profile for each client.

    • Review your open tabs before switching major tasks.

    • Keep a minimalist homepage so new tabs start clean.

    • Refuse to open new tabs during meetings.

    • Close tabs before walking away from your desk.

    • Apply the “one in, one out” rule when researching intensively.

    • Capture questions in a note so you stop opening tabs impulsively.

    Advanced users often blend several of these techniques.

    Final thoughts

    Once you adopt deliberate browser tabs management strategies, your digital workspace becomes calmer because you no longer rely on an ever-growing row of chaotic tabs to remember what matters or what needs attention, and instead begin using intentional systems that support focus, reduce mental friction, and keep projects moving smoothly. When you categorize tabs by intent, group them by topic, or reset them on a scheduled cycle, you create a flexible structure that adapts to your working style while keeping your browser from overwhelming you during research-heavy tasks. Over time, the investment you make in maintaining simple habits, storing information intentionally, and closing tabs with confidence produces a surprisingly profound sense of control, allowing your attention to remain on actual work rather than the clutter sitting at the top of your screen.

  • Digital File Naming Conventions

    Clear and consistent digital file naming conventions make it far easier to organize client work, locate the right documents quickly, and maintain a steady workflow without confusion or clutter.

    There comes a point in almost every freelancer’s workflow when it becomes painfully clear that the real problem is not the number of files stored on the computer but the lack of order behind each one, since without a standardized structure it becomes increasingly difficult to locate the right document, identify the latest version, or understand what a file contained weeks or months after it was created. Freelancers who juggle many client deliverables quickly discover that guesswork cannot support a smooth workflow, which is why adopting clear and repeatable digital file naming conventions can transform both speed and accuracy when managing ongoing projects.

    This guide breaks down a complete system that organizes file names so they remain findable across different devices, cloud services, folders, and project phases, and the tone remains systematic, example-heavy, and practical so that any freelancer can adopt the structure without feeling overwhelmed. You’ll learn how to build names that sort correctly, display the right information in the right order, support long-term archives, and keep collaboration clean and predictable even when clients request multiple revisions. You’ll also find common naming rules, proven patterns, versioning approaches, practical examples, and simple regex tips for batch-renaming or cleaning up messy folders.

    A meaningful naming system works because it removes friction from your workflow, allowing you to retrieve files instantly, compare versions accurately, and prevent mistakes that may cost time, money, or credibility. The more carefully you build your structure, the easier it becomes to maintain order long term, since consistency always generates clarity. When you combine careful naming with predictable folders, your entire digital workspace becomes lighter, more navigable, and easier to maintain.

    Why digital file naming conventions matter for freelancers

    Most freelancers keep dozens of projects open simultaneously, which means hundreds of drafts, clients, deliverables, and reference files accumulate quickly. Without stable naming conventions, everything becomes harder.

    Reasons naming conventions matter:

    1. They reduce search time dramatically because every file contains the same recognizable components.

    2. They help ensure that alphabetical sorting actually produces chronological order rather than random sequences.

    3. They eliminate the risk of sending the wrong draft to a client, something that can happen easily without clear versioning.

    4. They keep your mental load low because you no longer rely on memory to identify files.

    5. They make collaboration smoother since others can interpret files instantly.

    6. They support long-term archives when returning to old projects.

    A naming system becomes a silent assistant that keeps everything tidy from the moment you create a new file.

    Core components of effective digital file naming conventions

    A high-quality system uses components that, when combined in a predictable order, make the file’s purpose understandable at a glance. The goal is not complexity but clarity.

    Key components typically include:

    1. A client code or project identifier

    2. A clear description of what the file contains

    3. A standardized date in sortable format

    4. A consistent version tag

    5. A status or optional stage label

    Because each component serves a purpose, the order matters, and a good rule is placing the component that creates the strongest sorting logic first.

    Examples of components in action:

    • Client code: ACME_, LUMEN_, BRAVA_

    • Description: Invoice, HomepageCopy, DraftLogo, ProductPhotos

    • Date: 2024-03-21

    • Version: v01 or v03

    • Status: Draft, Approved, Delivered

    Sample complete file name:
    ACME_HomepageCopy_2024-03-21_v02_Draft.docx

    This stays readable, sortable, and flexible.

    Universal rules for naming files correctly

    Although different freelancers may personalize the patterns, these universal rules prevent technical issues and chaos.

    Rules worth following:

    • Do not use spaces; opt for underscores or hyphens to ensure compatibility.

    • Avoid all special characters like ? < > * : | because they break in many systems.

    • Always use a consistent date format that sorts correctly: YYYY-MM-DD.

    • Keep names short but descriptive.

    • Use all lowercase or consistent capitalization patterns.

    • Use leading zeros for versions so numbers sort correctly (v01, not v1).

    • Place the most important identifier at the beginning.

    • Avoid overly long or sentence-like file names that become unreadable.

    These principles protect you from sync errors, broken scripts, and confusion.

    Example naming structure for different types of freelancer work

    Different work types demand slightly different structures, but the overall pattern remains similar.

    For writers

    Client_ContentType_Topic_YYYY-MM-DD_v01.docx
    Example:
    BRAVA_Article_MindfulnessGuide_2024-03-12_v03.docx

    For designers

    Client_Project_AssetType_Size_YYYYMMDD_v01.png
    Example:
    ACME_BrandRefresh_Logo_1080x1080_20240316_v02.png

    For photographers

    Client_Shoot_Location_YYYYMMDD_Sequence.jpg
    Example:
    LUMEN_OfficeSession_20240310_0042.jpg

    For consultants

    Client_Project_ReportType_YYYY-MM-DD_v02.pdf
    Example:
    ACME_ProcessAudit_ExecutiveSummary_2024-03-09_v02.pdf

    Small adaptations create clarity without overcomplicating things.

    How to build your own naming conventions (step-by-step)

    A strong system requires intentional design; guessing rarely works.

    Steps to create your system:

    1. List all file types you produce (documents, images, invoices, assets, drafts).

    2. Choose the most important identifier (client or project).

    3. Pick a date format that sorts correctly.

    4. Decide between underscores or hyphens.

    5. Define a consistent versioning structure.

    6. Determine whether to include status labels.

    7. Write a simple, one-page naming guideline.

    8. Test your pattern on five sample files.

    9. Revise until the structure feels intuitive.

    A template you can adapt:
    Client_Project_Description_YYYY-MM-DD_v01_Status.ext

    Proven naming patterns that scale well

    Below are patterns used by many professionals, tested for clarity and longevity.

    Pattern 1: Prefix-first

    ACME_Q1Campaign_2024-03-21_v02
    Strong for freelancers with many clients.

    Pattern 2: Date-first

    2024-03-21_ACME_Invoice_v01
    Ideal for archivists or finance work.

    Pattern 3: Fixed-field

    Client__Project__Deliverable__Date__v01
    Double underscores maintain visual separation.

    Pattern 4: Index-based

    Client_Category_0001.jpg
    Excellent for bulk visual assets.

    Each pattern works for different workflows; the goal is to choose the one your brain understands instantly.

    Designing folder structures that complement naming conventions

    Even perfect file names collapse without sensible folders.

    A simple folder hierarchy:

    • Client folder

    • Project subfolders

    • Inside each project:

      • Planning

      • Content

      • Assets

      • Delivery

      • Archive

    Numbering folders helps:

    01_Planning
    02_Content
    03_Assets

    This keeps everything sorted in the correct logical order.

    digital file naming conventions

    Versioning strategies that prevent confusion

    Versioning remains one of the biggest sources of frustration for freelancers. A stable strategy ensures nothing gets overwritten or mis-sent.

    Common versioning structures:

    1. Incremental versions

      • v01, v02, v03

    2. Stage-based

      • v02_Draft, v03_ClientReview

    3. Date-based

      • v2024-03-21

    4. Combined

      • v03_Internal, v04_Approved

    Things to avoid:

    • final

    • final-final

    • final2

    • use-this-one

    Clarity always beats convenience.

    Real-world examples of full naming systems

    Example system for design projects

    BRAVA_Campaign_HeroBanner_1920x1080_20240320_v03.png

    Example system for client communication documents

    LUMEN_Proposal_WebCopy_2024-03-18_v01.pdf

    Example system for budgets or spreadsheets

    ACME_Q2Budget_Template_2024-03-10_v02.xlsx

    These examples keep essential information in predictable positions.

    Common mistakes freelancers make with file naming

    Even well-intentioned systems break if certain habits continue.

    Mistakes to avoid:

    • Mixing capitalization styles

    • Using abbreviations inconsistently

    • Forgetting dates on time-sensitive files

    • Using overly vague labels such as “notes” or “draft”

    • Adding too many detail words

    • Creating extremely long names

    • Using spaces instead of underscores

    Technical mistakes worth avoiding:

    • Special characters

    • Leading spaces

    • Names identical except for accidental spaces

    • Inconsistent separators

    Quick improvements anyone can make today

    If rebuilding your entire system feels overwhelming, start small.

    Quick wins include:

    1. Adding dates to active files.

    2. Renaming versions with v01 style numbering.

    3. Standardizing abbreviations.

    4. Replacing spaces with underscores.

    5. Archiving older drafts into a dedicated folder.

    6. Re-naming any file labeled “final”.

    7. Grouping files by client and project.

    Even five minutes of cleanup can create significant clarity.

    Regex tips to batch-rename and clean up large sets of files

    Regex helps automate renaming, especially when fixing messy archives.

    Useful patterns:

    • Remove repeated spaces:

      • Find: \s+

      • Replace: _

    • Convert MM-DD-YYYY to YYYY-MM-DD:

      • Find: (\d{2})-(\d{2})-(\d{4})

      • Replace: $3-$1-$2

    • Replace “final” with versioning:

      • Find: final

      • Replace: v01

    Renaming safety practices:

    • Always test on duplicates.

    • Preview changes if your tool supports it.

    • Apply regex in small batches.

    Regex turns large organizational tasks into manageable ones.

    Monthly maintenance routine to keep your structure clean

    A monthly review keeps your naming system strong.

    Maintenance tasks:

    1. Archive completed projects.

    2. Standardize any inconsistent names.

    3. Merge duplicate files.

    4. Clean the downloads folder.

    5. Reconfirm your naming guideline.

    6. Update versioning if formats changed.

    7. Back up essential client documents.

    Routine maintenance protects you from chaos.

    Final thoughts

    A well-designed system of digital file naming conventions gives freelancers the clarity they need to work faster, collaborate smoothly, and retrieve files without ever relying on memory or guesswork, because consistent naming automatically builds order into every part of the workflow. By combining client identifiers, descriptive tags, predictable dates, simple separators, and stable versioning, you create a structure that remains comprehensible even years later, and when supported by thoughtful folder organization and recurring maintenance, your digital workspace becomes a tool that works for you rather than something you fight against. The longer you use your naming conventions, the more natural the system becomes, turning a once chaotic environment into a clean, clear, and reliable foundation for all of your work.

  • Zoom Call Setup Checklist

    Preparing for a Zoom call becomes much easier when you follow a clear setup routine that ensures everything works as expected.

    Sometimes a video call becomes far smoother and more professional simply by preparing a few details in advance, and although it might look like a long list at first glance, the process quickly becomes second nature once you understand what matters, why it matters, and how each small adjustment contributes to a clearer, calmer, and more reliable communication experience.

    Many remote teammates and managers rely on video calls throughout the day, so establishing a repeatable routine helps you feel more confident even when unexpected issues appear.

    This guide is designed to offer a complete, practical, and easy-to-follow Zoom call setup checklist that ensures your camera, lighting, microphone, internet connection, background, workspace, and personal presence all support the professional impression you want to create. You’ll also find a detailed room preparation plan, a technical safety check, fallback strategies for emergencies, and an editor-tested list of small adjustments that consistently improve the quality of your calls. Because the goal is clarity rather than perfection, every recommendation is safe, non-technical, and suitable for anyone working remotely in apartments, shared households, home offices, or improvised workspaces.

    Why a Zoom Call Setup Checklist Helps You Look and Sound More Professional

    People often assume video quality depends on expensive gear, yet the truth is that thoughtful preparation, simple adjustments, and awareness of your environment matter far more. When you use a consistent checklist before each meeting, you reduce stress, avoid last-minute scrambling, and communicate more clearly with coworkers.

    A strong checklist works because:

    • It prevents technical issues from affecting your confidence.

    • It reduces the chances of joining late or troubleshooting in front of others.

    • It creates consistent lighting and audio, so you always appear prepared.

    • It reduces distractions in the frame and keeps the conversation focused.

    • It helps you handle unexpected interruptions without panic.

    • It ensures your setup remains accessible and repeatable even on busy days.

    By treating video calls like any other professional task that benefits from routine, you create a more stable work rhythm.

    The Complete Zoom Call Setup Checklist (Editor-Tested)

    This section compiles the most important steps into a single, comprehensive checklist. Later sections will break each part into deeper detail.

    Core Checklist

    1. Clean your camera lens or webcam for a sharper image.

    2. Balance lighting with a clear source in front of you.

    3. Position the camera at eye level to create natural framing.

    4. Check your microphone with a quick sound test.

    5. Shutdown apps that use audio in the background.

    6. Adjust your background or turn on a clean virtual option.

    7. Align your seating so you remain centered in the frame.

    8. Confirm your internet connection is stable.

    9. Manage notifications to avoid interruptions.

    10. Prepare documents and tabs before joining the meeting.

    11. Test screen sharing if you will need it.

    12. Silence unnecessary devices in the room.

    13. Confirm headphones or earbuds work if you plan to use them.

    14. Check your name display for accuracy and clarity.

    15. Join the meeting two or three minutes early to confirm everything looks correct.

    This list creates a reliable foundation for every professional Zoom call, whether informal or highly structured.

    How to Set Up Your Webcam for Clear, Confident Video

    The camera influences how people perceive your presence, so small adjustments enhance engagement significantly.

    Camera Height and Position

    • Place the camera at eye level or slightly above.

    • Avoid looking down into the webcam, which can distort perspective.

    • Keep your face in the upper-middle of the frame, not too close and not too far.

    • Tilt the screen until your posture looks natural and upright.

    Camera Quality Improvements

    1. Wipe the lens with a soft cloth to remove smudges.

    2. Close apps using the camera such as conferencing tools or browser tabs.

    3. Adjust exposure or brightness if your camera software allows it.

    Framing Guidelines

    • Leave a small amount of headroom above your head.

    • Keep your shoulders visible for a more human, grounded presence.

    • Avoid wide angles that include clutter, doors, or bright windows.

    Clear framing makes you appear composed even before the conversation begins.

    Lighting: A Simple, High-Impact Fix for Better Video Calls

    Good lighting improves your appearance more than any webcam upgrade, and fortunately, it is usually achieved with simple positioning.

    Essential Lighting Principles

    1. Keep your primary light source in front of you.

    2. Avoid sitting with a bright window behind you.

    3. Use natural light whenever possible, but soften it with curtains if needed.

    4. Position lamps slightly to the side to reduce harsh shadows.

    Types of Light to Use

    • Soft desk lamps

    • Indirect window light

    • Adjustable LED lights

    • Ceiling lights supplemented with front-facing lamps

    Avoid

    • Overhead spotlights casting downward shadows

    • Backlights that silhouette your face

    • Multi-color LED strips that distort skin tone

    Balanced lighting conveys attentiveness and minimizes visual distractions.

    Audio: Ensuring Clear, Steady Sound

    Audio clarity matters even more than visuals during remote meetings, because poor sound makes it difficult for others to follow along.

    Pre-Call Microphone Check

    1. Use Zoom’s built-in test feature.

    2. Speak at a normal volume to confirm clarity.

    3. Adjust input level so your voice is neither too quiet nor too loud.

    4. Try tapping lightly on the microphone to ensure Zoom is using the correct device.

    Microphone Placement

    • Keep the microphone eight to ten inches from your mouth.

    • Angle it slightly downward if using an external device.

    • Avoid brushing against clothing, cords, or desks.

    Reducing Background Noise

    • Close windows to reduce outdoor sound.

    • Turn off fans that create humming or wind noise.

    • Avoid typing directly near the microphone.

    • Reduce echo by adding soft materials such as curtains or rugs.

    Clear audio helps people experience the call with less strain.

    Background Setup: Creating a Calm, Professional Visual Environment

    Backgrounds shape first impressions immediately, so preparing a clean space supports your message and reduces distractions.

    Physical Background Recommendations

    • Choose a simple wall or bookshelf behind you.

    • Remove distracting items such as piles of clothing or busy decorations.

    • Keep lighting consistent across the background to avoid harsh contrast.

    • Position yourself away from doors that may open mid-call.

    Virtual Background Tips

    • Prefer neutral virtual backgrounds that mimic real spaces.

    • Avoid motion or animated backgrounds.

    • Test lighting before enabling a virtual background, since shadows can create outlines.

    A well-managed background subtly communicates readiness and respect for the meeting.

    Pre-Call Technical Check: Ensuring Smooth Performance

    Because many issues arise when a device becomes overloaded, a pre-call system check helps prevent lag.

    Steps to Prepare Your Device

    1. Close unused apps and browser tabs.

    2. Restart your computer if it has not been rebooted recently.

    3. Disconnect from corporate VPNs unless required.

    4. Pause cloud backups temporarily if they strain the connection.

    5. Turn off intensive downloads on other household devices.

    Network Preparation

    • Move closer to the router for stable Wi-Fi.

    • Use an Ethernet cable if available.

    • Confirm no one in the home is streaming high-definition video.

    • Turn off bandwidth-heavy smart home automations during important calls.

    These steps boost stability and prevent performance interruptions.

    zoom call setup checklist
    Preparing Your Room and Workspace

    Physical environment influences the quality of your presence, especially during longer calls.

    Room Organization

    • Arrange your workspace so you can reach essential documents easily.

    • Remove clutter from the desk surface.

    • Stabilize wobbly chairs or tables to avoid camera shake.

    • Keep your phone silent unless used as a backup device.

    Noise Control

    1. Inform household members of your meeting time.

    2. Close pets out of the room if they may disrupt the call.

    3. Turn off noisy appliances such as air purifiers or washing machines.

    4. Choose a room with soft furnishings to absorb sound.

    Creating a calm physical setting improves how you feel and how you come across.

    Preparing Yourself: Body Language, Voice, and On-Camera Presence

    Because video calls reduce subtle communication cues, preparing your on-camera presence helps participants connect with you more easily.

    Appearance

    • Choose clothing with simple patterns or solid colors.

    • Avoid shiny accessories that reflect light.

    • Ensure your hair is tidy and not covering the camera view.

    Body Language

    • Maintain a relaxed but upright posture.

    • Use natural gestures without leaning into the camera.

    • Nod during conversations to show engagement.

    • Keep your eyes near the camera lens when speaking.

    Voice

    • Speak slowly enough for audio to remain clear.

    • Pause briefly when transitioning topics.

    • Lower your volume slightly if your microphone is sensitive.

    Thoughtful presence elevates the professionalism of any remote meeting.

    Essential Zoom Controls to Check Before Each Call

    Knowing where key controls are located helps you navigate unexpected situations confidently.

    Zoom Settings Worth Reviewing

    1. Microphone selection: pick the correct audio device.

    2. Speaker output: confirm sound plays through the right headset or speaker.

    3. Video device menu: ensure you are using the intended camera.

    4. Background effects: confirm you selected a stable backdrop.

    5. Touch up appearance: adjust lightly if needed.

    6. HD or low-light settings: review based on room lighting.

    7. Recording preferences: set permissions if recording is required.

    During-Call Controls to Know

    • Mute and unmute

    • Start and stop video

    • Share screen options

    • Chat panel

    • Participants menu

    • Reactions and hand-raise features

    Familiarity reduces stress and keeps you focused on the conversation.

    Screen Sharing Preparation

    Sharing your screen creates additional responsibilities, particularly around privacy, clarity, and organization.

    Preparing for Screen Sharing

    1. Pre-open all documents you plan to present.

    2. Close tabs or apps containing sensitive information.

    3. Increase your display brightness for clearer viewing.

    4. Set your desktop wallpaper to something neutral.

    5. Disable desktop notifications temporarily.

    While Sharing

    • Move your cursor slowly when highlighting items.

    • Zoom in or enlarge text if presenting dense material.

    • Speak slightly slower to allow participants to follow.

    • Confirm participants can see your slides or content.

    Screen sharing works best when your workspace looks intentional, not rushed.

    Creating a Fallback Plan for Technical Difficulties

    Even with strong preparation, issues occasionally arise, and having a fallback plan ensures you can rejoin quickly.

    Backup Strategies

    1. Keep your phone nearby with the Zoom app installed.

    2. Store meeting ID and passcode in a note or calendar entry.

    3. Save important documents offline in case Wi-Fi drops.

    4. Have a pair of wired earbuds available if Bluetooth fails.

    5. Write down troubleshooting steps such as restarting Zoom or switching audio devices.

    During a Problem

    • Communicate briefly in the chat if possible.

    • Rejoin using your phone if the computer freezes.

    • Turn off your video to preserve bandwidth.

    • Switch from Wi-Fi to hotspot only if absolutely necessary and safe.

    Preparedness helps the meeting continue smoothly even during small setbacks.

    Editor-Tested Micro-Tweaks That Improve Call Quality Instantly

    Small adjustments often create surprising improvements.

    Micro-Tweaks

    • Place a sheet of white paper under your monitor to bounce light upward.

    • Raise your laptop with a stack of books to improve posture.

    • Use a stable table instead of a bed or couch.

    • Tilt blinds to reduce glare behind you.

    • Mark your camera with a tiny sticker as an eye-focus reminder.

    These lightweight enhancements support your presence without requiring new equipment.

    Weekly Maintenance Routine for Consistent Call Quality

    Creating a short weekly routine helps ensure your setup remains reliable over time.

    Weekly Routine

    1. Clean your camera lens and screen.

    2. Restart your device to clear performance issues.

    3. Check whether lighting conditions have changed.

    4. Adjust your background if your workspace shifted.

    5. Review Zoom settings for updates or new features.

    6. Test microphone quality briefly.

    7. Inspect your chair and desk for stability.

    8. Refresh your earbuds or headphones by charging or cleaning.

    Maintenance reduces the likelihood of unexpected issues.

    Final Thoughts

    A well-prepared Zoom call setup checklist benefits not only your own confidence but also the experience of everyone who joins the meeting with you, because consistent preparation eliminates friction, improves communication flow, and demonstrates respect for your colleagues’ time. As remote work continues to evolve, the ability to create a stable, professional, and predictable video-call environment becomes a valuable skill, and when you combine lighting, audio, background, posture, device preparation, and fallback plans into a single repeatable routine, you create a smoother workday for yourself and for others. Over time, these habits become second nature, and you will begin to approach every call with greater calm, clarity, and readiness.

  • Quick Fixes for Slow Wi-Fi

    Slow Wi-Fi can appear out of nowhere, turning simple online tasks into frustrating delays.

    Anyone who has ever lived in an apartment or small home has likely experienced that familiar moment when the Wi-Fi seems to drag, pages freeze halfway through loading, videos buffer endlessly, or calls begin to cut in and out for no obvious reason, and although it can be incredibly frustrating, most people remain surprised by how many simple, safe adjustments can make a dramatic difference in speed and stability.

    Because slow Wi-Fi rarely comes from a single cause, learning a handful of quick fixes for slow Wi-Fi allows you to diagnose issues with a calmer mindset and correct them without needing complicated tools or deep technical knowledge.

    This guide walks you through the most reliable strategies for everyday users dealing with lag, signal drops, or inconsistent speeds, especially in apartment settings where neighbors, walls, and layout quirks can interfere with signal quality.

    Throughout the article, the tone remains grounded and practical, focusing on steps that are safe, reversible, and easy to perform even if you’ve never adjusted router settings before. You’ll find checklists, channel guidance, hardware positioning tips, interference troubleshooting, and clear explanations of when it’s appropriate to call your internet service provider. While the information is based on mainstream vendor recommendations, it is written in plain language so anyone can make immediate improvements confidently.

    Why Wi-Fi Slows Down in Real Homes and Apartments

    Because Wi-Fi signals behave differently in each environment, understanding the core reasons behind slowdowns helps you fix problems more effectively. Apartment buildings in particular create conditions that are often overlooked.

    Several issues contribute to slow Wi-Fi:

    • Too many neighboring routers using the same channel

    • Thick walls that absorb or weaken the signal

    • Poor router placement inside cabinets or corners

    • Older routers that cannot handle modern speeds

    • Devices that cling to weak far-away signals

    • Interference from microwaves, Bluetooth devices, and smart gadgets

    • Temporary congestion during peak usage hours

    • Background apps or downloads quietly consuming bandwidth

    Once you understand these factors, you can apply the right quick fixes without guessing.

    Quick Fixes for Slow Wi-Fi You Can Try Immediately

    Before adjusting advanced settings, simple physical and placement changes often produce the fastest improvements.

    Physical Adjustments That Improve Signal Strength

    1. Move the router to a more central spot, because a signal traveling outward from a corner wastes coverage where you don’t need it.

    2. Lift the router onto a shelf or table, which helps the signal travel more cleanly across the room.

    3. Keep it away from metal surfaces or microwaves, as those can block or distort the signal.

    4. Angle antennas vertically, if your router includes external antennas, to help distribute coverage more evenly.

    5. Remove clutter from around the router, letting the signal spread without obstruction.

    Quick Digital Fixes

    • Restart the router to clear temporary congestion.

    • Disconnect devices you’re not actively using.

    • Stop large background downloads on phones, game consoles, or PCs.

    • Turn off VPNs temporarily if they’re causing slowdowns.

    • Forget and reconnect your Wi-Fi network to reset the device’s handshake.

    These steps often resolve temporary issues without touching deeper settings.

    Optimizing Router Placement in an Apartment

    Because apartments have unique structural challenges, placement can make or break your connection.

    Key Apartment Placement Guidelines

    1. Avoid the far end of the apartment, because the signal weakens as it travels through rooms.

    2. Stay away from hidden corners, closets, or under desks where walls absorb the signal.

    3. Keep the router high, ideally at eye level or slightly above.

    4. Give the router breathing room, ensuring airflow and reduced interference.

    5. Place it near the center of activity, such as the living room or a hallway.

    Spots That Typically Cause Problems

    • Inside TV cabinets

    • Behind large furniture

    • On the floor

    • Next to fish tanks

    • Under metal shelving

    • Behind thick concrete walls

    Simply moving the router often results in clearer performance without changing any settings.

    Channel Changes: One of the Best Quick Fixes for Slow Wi-Fi

    When too many neighboring routers use the same channel, your signal competes constantly. Adjusting the channel is one of the most effective solutions in crowded apartment buildings.

    Understanding Channels in Simple Terms

    • Wi-Fi channels are like lanes on a road.

    • When everyone uses the same lane, traffic slows.

    • Choosing a less crowded lane speeds things up.

    Safe Steps for Choosing Better Channels

    1. Check whether your router is set to auto-channel.

    2. Look for settings related to channel selection in the Wi-Fi menu.

    3. Switch the 2.4 GHz band to channel 1, 6, or 11, because these three operate without overlapping.

    4. Test channels one at a time and observe improvements over a day.

    5. Adjust the 5 GHz band if available, selecting a mid-range channel for balance.

    When Changing Channels Helps Most

    • You live in a building with many routers

    • Speed drops during evenings or weekends

    • Your signal seems strong but the internet remains slow

    Channel changes often resolve congestion instantly.

    Using the Right Wi-Fi Band: 2.4 GHz vs 5 GHz

    Because Wi-Fi bands behave differently, choosing the correct band for each device helps keep your network stable.

    2.4 GHz

    • Travels farther

    • Penetrates walls better

    • More crowded and slower

    Ideal for:

    • Smart home gadgets

    • Phones far from the router

    • Older devices

    5 GHz

    • Faster speeds

    • Shorter range

    • Less interference

    Ideal for:

    • Streaming

    • Video calls

    • Gaming

    • Work laptops

    Quick Fix

    Split your network names into separate 2.4 and 5 GHz networks if your router allows it. This helps devices connect to the correct band automatically.

    Eliminating Interference for Faster Wi-Fi

    Countless household items create invisible interference that slows or distorts Wi-Fi signals. Many apartment dwellers never realize how common these issues are.

    Common Sources of Wi-Fi Interference

    • Microwave ovens

    • Baby monitors

    • Old cordless phones

    • Bluetooth speakers

    • Smart lights

    • Metal shelving

    • TVs blocking router fronts

    • Densely wired entertainment centers

    How to Reduce Interference

    1. Keep your router away from these objects.

    2. Turn off Bluetooth on devices you’re not using.

    3. Separate the router from large metal objects.

    4. Avoid placing the router behind electronics.

    Removing interference often produces instant improvements, especially in small spaces.

    quick fixes for slow wifi

    Bandwidth Management: Making Sure Devices Don’t Hog the Connection

    Sometimes the problem is not the Wi-Fi signal itself but how many devices are consuming bandwidth at once.

    Devices That Often Drain Bandwidth Quietly

    • Smart TVs downloading updates

    • Cloud backup apps running in the background

    • Game consoles installing patches

    • Phones uploading photos

    • Laptop syncing software

    Simple Bandwidth Fixes

    • Pause or schedule updates outside peak hours.

    • Turn off automatic cloud backups temporarily.

    • Set large downloads to nighttime.

    • Reduce streaming quality during busy periods.

    Small adjustments prevent one device from slowing the entire network.

    Resetting the Router Safely

    Restarting and resetting often get confused, yet they are not the same.

    Safe Restart

    • Unplug the router for 10 seconds

    • Plug it back in

    • Wait for full reboot

    Use this for temporary slowdowns.

    Full Reset

    Only use when nothing else works, because a full reset returns all settings to default.

    Signs you may need a full reset:

    • The Wi-Fi drops every few minutes

    • Devices fail to connect consistently

    • Speed is dramatically lower than expected

    • The router becomes unresponsive

    Always keep your login details and Wi-Fi password handy before resetting.

    Testing Speed Properly

    Accurate measurement requires a consistent process.

    How to Measure Wi-Fi Speed Correctly

    1. Stand near the router for the baseline test.

    2. Use multiple devices to confirm results.

    3. Turn off VPNs temporarily.

    4. Pause downloads or streaming.

    5. Compare results at different times of day.

    What You’re Looking For

    • Baseline speed near the router

    • Differences in other rooms

    • Sudden drops during specific hours

    • Consistency across devices

    These clues help you pinpoint the real cause of slow Wi-Fi.

    A Practical Checklist of Quick Fixes for Slow Wi-Fi

    Use this repeatable list whenever your connection feels sluggish.

    The Speed Recovery Checklist

    1. Restart the router.

    2. Move the router to a better spot.

    3. Remove objects blocking the signal.

    4. Switch channels to reduce congestion.

    5. Connect devices to the correct Wi-Fi band.

    6. Stop or reschedule background downloads.

    7. Disable unnecessary VPN usage.

    8. Reduce interference from Bluetooth or electronics.

    9. Test speed near the router for comparison.

    10. Reconnect devices that cling to weak signals.

    Checking these items helps you remove the most common bottlenecks.

    When Slow Wi-Fi Is Caused by Old Hardware

    Some routers simply cannot handle modern streaming, gaming, or work-from-home demands.

    Signs Your Router May Be Too Old

    • It struggles with more than a few devices.

    • It doesn’t support 5 GHz.

    • It runs hot or needs frequent restarts.

    • It came from your ISP many years ago.

    Quick Hardware Fixes

    • Use newer dual-band or tri-band routers.

    • Add a mesh extender if coverage is uneven.

    • Replace outdated ISP routers with your own device.

    You don’t need expensive gear, but basic modern standards help dramatically.

    When to Call Your ISP

    At a certain point, you may have done everything on your end and the issue lies outside your home.

    It’s Time to Call Your ISP If:

    • Speed is below your plan even near the router.

    • Outages happen frequently.

    • The connection fails at consistent times each day.

    • The modem light indicators show problems.

    • Resetting never helps.

    What to Ask For

    • A line quality check

    • A modem replacement

    • Help interpreting router diagnostics

    • Confirmation of outages in your area

    Having a clear list helps you get support faster.

    A Gentle Weekly Wi-Fi Maintenance Routine

    Most people never revisit their settings, yet a short weekly routine helps keep things smooth.

    Weekly Wi-Fi Routine

    1. Restart the router once a week.

    2. Check whether any new devices joined your network.

    3. Make sure the router hasn’t been moved or blocked.

    4. Look for high-usage apps draining bandwidth.

    5. Monitor speed at least once per week.

    6. Review interference sources if the connection drops suddenly.

    These actions keep your network running efficiently with minimal effort.

    Glossary of Key Terms for Everyday Users

    Understanding basic Wi-Fi vocabulary helps you feel more confident adjusting settings.

    Important Terms

    • Bandwidth: The amount of data your connection can carry at once.

    • Channel: A specific segment of Wi-Fi frequency used for communication.

    • Interference: Objects or signals that weaken your Wi-Fi.

    • 2.4 GHz: Longer-range but slower Wi-Fi band.

    • 5 GHz: Faster but shorter-range Wi-Fi band.

    • Router: Device that broadcasts your Wi-Fi signal.

    • Modem: Device that connects your home to your ISP’s network.

    • SSID: Your network name.

    • Congestion: Slowness caused by many devices or networks nearby.

    • Mesh system: Multiple nodes used to improve coverage in larger spaces.

    A basic glossary reduces confusion when adjusting settings.

    Final Thoughts

    Understanding these quick fixes for slow Wi-Fi gives you the confidence to manage your connection without stress, because most problems can be solved through a mix of careful placement, interference reduction, channel adjustments, and simple router management. Apartment users especially benefit from learning how neighboring networks influence signal quality, since congestion and wall density often play a larger role than hardware limitations. By combining one or two physical improvements with smarter bandwidth usage and a weekly routine, you can prevent slowdowns before they occur and maintain a smoother, more reliable connection for work, streaming, video calls, and everyday life. And when you occasionally need help from your ISP, you’ll be equipped with clear observations that make troubleshooting faster and easier.

  • Privacy Settings You Should Check

    Because our devices store so much personal information, reviewing key privacy settings helps you stay in control without adding stress.

    Many people use their phones, laptops, and apps every day without realizing how much information flows quietly in the background, and although most of this activity is normal for modern technology, it can still create a sense of uncertainty when you’re not sure which apps can see your location, which permissions you’ve granted accidentally, or which settings might be sharing more than you intended.

    Because digital life expands gradually over years, privacy controls often remain untouched, and only when you pause to reflect do you notice how complicated things have become. Learning the privacy settings you should check is not about paranoia or fear; instead, it is about creating a sense of clarity, comfort, and intention around the way your devices handle your information.

    This guide walks you through the most important privacy settings on major platforms—iPhone, Android, Windows, macOS, Google, and social apps—while keeping the tone calm and practical. You will find step-by-step checklists, explanations of what each option does, simple recommendations for safer defaults, and a glossary of common privacy terms that often confuse everyday users. Rather than overwhelming you with technical jargon, this guide emphasizes clarity, helping you understand not only which settings matter but why they matter, and how they fit into your daily digital routine.

    Why Checking Privacy Settings Matters (Without Alarmism)

    Although online safety discussions often feel dramatic, privacy is more about boundaries than danger. Device manufacturers and app developers frequently enable features that benefit convenience, yet those same features sometimes gather more data than users realize.

    A gentle approach works best because:

    • Privacy settings help you decide how much information to share, not whether technology is safe.

    • Many defaults favor convenience, so taking ten minutes to adjust them gives you more control.

    • Small adjustments can reduce unnecessary data collection without affecting usability.

    • Clear boundaries reduce anxiety and help you use technology with confidence.

    • Regular reviews ensure your settings stay aligned with your changing needs.

    Thinking of privacy as housekeeping rather than crisis prevention makes the process far more approachable.

    A Calm Framework for Reviewing Privacy Settings

    Before diving into platform-specific steps, it helps to understand the overarching framework.

    The Four Categories of Privacy You Should Check

    1. Permissions: Which apps can access your camera, microphone, location, contacts, or photos.

    2. Data Sharing: Which services collect usage data, analytics, or personalized recommendations.

    3. Security Settings: Which features protect your account, device, and backup information.

    4. Visibility Controls: Which information other people can see, especially on social platforms.

    This framework simplifies privacy into a pattern you can repeat on any device.

    Privacy Settings You Should Check on iPhone

    Apple provides one of the clearest permission dashboards, and adjusting a few key settings helps you regain visibility.

    Essential iPhone Permission Checks

    1. Location Permissions

      • Review apps using “Always,” “While Using,” or “Ask Next Time.”

      • Consider switching most apps to “While Using” to reduce passive tracking.

    2. Camera and Microphone Access

      • Check which apps have ongoing access.

      • Remove permission from apps that do not need these features regularly.

    3. Photos Access

      • Use “Selected Photos” for apps that do not need your full library.

    4. Contacts and Calendars

      • Allow only apps that genuinely require these details for functionality.

    5. Motion and Fitness Data

      • Limit apps that read step counts or device orientation unless intentional.

    6. Bluetooth and Local Network Access

      • Review apps with unnecessary local network discovery privileges.

    Additional iPhone Privacy Settings

    • Analytics & Improvements: Turn off sending device analytics if you prefer reduced data sharing.

    • Tracking: Disable “Allow Apps to Request to Track” to prevent cross-app tracking.

    • App Privacy Reports: View which apps access sensors or network activity most often.

    • Mail Privacy Protection: Reduce data collected through email pixels.

    Because Apple surfaces these features in clear menus, a quick review goes a long way.

    Privacy Settings You Should Check on Android

    Android devices vary by manufacturer, yet most recent versions offer structured privacy dashboards that resemble those on iPhones.

    Key Android Permission Checks

    1. Location Access

      • Change “Allow all the time” permissions to “Allow only while using.”

      • Disable Wi-Fi and Bluetooth scanning if you prefer reduced passive detection.

    2. Camera and Microphone Access

      • Use quick toggles to disable both when not needed.

      • Check which apps used these sensors recently.

    3. Files and Media

      • Grant “Allow access to media only” instead of full file system access when possible.

    4. Nearby Devices

      • Allow only devices you trust; disable scanning for unneeded peripherals.

    5. Contacts, SMS, and Call Log Access

      • Remove permissions from apps that request communication details without strong justification.

    Additional Android Privacy Controls

    • Permissions Manager: Displays all permissions by type, making it simple to spot unusual access.

    • Privacy Dashboard: Shows a timeline of sensor usage.

    • Do Not Disturb Rules: Help silence data-rich apps during quiet hours.

    • Advertising ID Controls: Reset or disable personalized ads.

    Android offers deep customization, so taking time to adjust these controls ensures a balanced approach between convenience and privacy.

    Privacy Settings You Should Check on Windows

    Many people use Windows computers daily yet rarely explore the privacy menu, which includes several important categories.

    Essential Windows Privacy Items

    1. Location Services

      • Turn off system-wide location if unnecessary.

      • Allow location for only a few trusted apps, such as maps or weather.

    2. Camera and Microphone Access

      • Disable global access if you use standalone headsets or webcams.

      • Enable per-app permissions rather than system-wide access.

    3. Diagnostics Data

      • Choose minimal data sharing when reviewing device health reporting options.

    4. Activity History

      • Clear history logs if you prefer not storing past file or app activity.

    5. Background Apps

      • Disable unneeded apps running in the background, reducing data usage and location leakage.

    6. File System Access

      • Allow only essential apps to read or modify device storage.

    Additional Windows Considerations

    • Wi-Fi Sense: Turn off features that automatically connect to open networks.

    • SmartScreen: Keep security protections enabled for safer downloads.

    • App Permissions Dashboard: Review apps using hardware sensors or personal data.

    Windows has many layers, so revisiting these categories every few months helps maintain control.

    Privacy Settings You Should Check on macOS

    macOS offers fine-grained privacy controls similar to iOS, though some categories behave slightly differently on desktops.

    macOS Permission Checklist

    1. Location Services

      • Review which desktop applications use your location.

      • Disable system services you do not actively use.

    2. Contacts, Calendars, and Reminders

      • Keep these permissions limited to trusted apps.

    3. Photos and Files

      • Grant file access per folder if an app does not require full disk access.

    4. Screen Recording and Accessibility

      • Check for apps with screen capture permissions.

      • Remove access from tools you no longer use.

    5. Full Disk Access

      • Restrict this setting to essential backup or security tools only.

    6. Bluetooth Access

      • Limit apps that do not require proximity-based features.

    Additional macOS Tips

    • Analytics: Opt out of sending usage data if preferred.

    • Firewall: Enable the macOS firewall for stronger network control.

    • Login Items: Review apps that launch at startup to avoid unnecessary background activity.

    macOS keeps these settings organized, making the review process straightforward and calm.

    Privacy Settings You Should Check in Your Google Account

    Because Google services connect across multiple devices, reviewing your Google Account privacy settings is essential for maintaining overall digital boundaries.

    Key Google Areas to Review

    1. Location History

      • Turn off auto-logging if you prefer not storing travel data.

      • Clear older history entries if needed.

    2. Web & App Activity

      • Limit storing searches and voice interactions.

      • Manage whether recordings are associated with your account.

    3. YouTube Activity

      • Adjust ad personalization and watch history storage.

    4. Ad Personalization Controls

      • Review categories assigned to your profile.

      • Disable personalization if desired.

    5. Device Activity Logs

      • Check active devices and sign out of those you no longer use.

    6. Connected Apps & Permissions

      • Remove third-party apps you no longer trust or use.

    Because Google services integrate across phones, laptops, and smart devices, reviewing these settings regularly ensures your data stays manageable.

    privacy settings you should check

    Privacy Settings You Should Check on Social Apps

    Social platforms often gather more data than expected, so reviewing visibility and sharing controls helps maintain your comfort level.

    Common Social App Settings to Review

    • Profile visibility: Choose whether your account is public or private.

    • Location tags: Disable automatic tagging in posts or comments.

    • Contact syncing: Decide whether apps import your phone contacts.

    • Ad preferences: Limit personalized ads based on activity or interactions.

    • Tagging controls: Review who can tag you and how those tags appear.

    • Search visibility: Hide your profile from external search results if preferred.

    • Message requests: Adjust who can contact you.

    These adjustments help ensure your social presence reflects your boundaries rather than default settings.

    A Unified Checklist: Privacy Settings You Should Check on Any Device

    This universal checklist helps you review privacy settings consistently across different platforms.

    The Universal Privacy Checklist

    1. Review which apps track your location.

    2. Check which apps use your camera and microphone.

    3. Review which apps can access your photos or files.

    4. Audit permissions for contacts, calendar, and messages.

    5. Limit background data usage for unnecessary apps.

    6. Adjust analytics and usage data preferences.

    7. Review account-level privacy settings (Google, Apple, Microsoft).

    8. Manage social media visibility and contact syncing.

    9. Strengthen device passcodes and screen lock settings.

    10. Review app privacy reports or dashboards.

    11. Check for old devices connected to your account.

    12. Review third-party apps linked to major accounts.

    Following this list once a month keeps your privacy aligned with your comfort level.

    A Calm, Repeatable Monthly Privacy Routine

    Because privacy settings evolve over time, a gentle monthly routine helps you stay updated without feeling overwhelmed.

    Monthly Routine Guide

    1. Scan permissions for any app you installed in the last thirty days.

    2. Check account activity logs to ensure all devices are recognized.

    3. Review notifications that may be sharing more than necessary.

    4. Adjust ad settings if they feel intrusive.

    5. Clear unneeded browsing or search history to reduce data trails.

    6. Reevaluate location settings for apps you no longer use.

    7. Remove old apps you downloaded temporarily.

    Monthly reviews keep your digital space clean and comfortable.

    A Glossary of Privacy Terms You Should Know

    Understanding these terms makes the rest of your privacy decisions easier.

    Key Terms

    • Permissions: Controls determining what data an app can access.

    • Location Services: Features that allow apps or devices to track your position.

    • Analytics: Usage data collected to improve app performance or personalization.

    • Ad Personalization: Tailoring ads based on activity or interests.

    • Background Activity: When apps run tasks even when not open.

    • Device History: A log of login locations, devices, and account sessions.

    • Full Disk Access: Permission allowing apps to read all files on your device.

    • Tracking: Cross-app or cross-website monitoring for behavior patterns.

    • Account Syncing: Automatic transfer of settings or data across devices.

    A solid understanding of these words helps you navigate privacy menus confidently.

    Final Thoughts

    The process of reviewing the privacy settings you should check is less about limiting your digital life and more about ensuring that your devices serve you in ways that feel comfortable, intentional, and aligned with your values. Although the number of menus, toggles, and permissions can seem overwhelming at first glance, breaking the process into small, structured steps allows you to regain control without stress. Every time you audit a permission, refine a setting, or adjust a visibility option, you strengthen the boundary between your personal life and the systems that support it. Over time, these quiet changes accumulate into a digital environment that feels calmer, safer, and more in tune with how you truly want to use your devices.

  • How to Use Split Screen

    Split screen makes multitasking easier by keeping two apps visible at once.

    Many students, professionals, and everyday computer users eventually reach a point where switching back and forth between windows becomes not only inefficient but mentally exhausting, and this is often the moment when they realize that learning how to use split screen can completely change the way they work, study, research, or simply browse the web.

    Splitting your screen allows you to view two apps or two documents side by side, which makes tasks such as comparing notes, transcribing information, dragging files, attending online classes, or responding to emails far smoother than juggling overlapping windows. Because most modern operating systems now include built-in split-screen features, the key challenge is not access but clarity—understanding exactly how each platform handles snapping, resizing, keyboard shortcuts, and window layouts so you can multitask without friction.

    This guide walks you through every major operating system—Windows, macOS, ChromeOS, iPadOS, and Android—so you not only learn the mechanics of split-screen mode but also gain a sense of which gestures, shortcuts, and onscreen prompts help you work with greater focus. You will also learn practical use cases, a troubleshooting section, a repeatable weekly layout routine, and a variety of efficiency tips that make split screen feel natural instead of awkward. Throughout the guide, the tone remains visual, simple, non-technical, and grounded in real workflows.

    Why Split Screen Improves Productivity More Than You Expect

    The value of split screen becomes evident the moment you no longer need to shuffle between overlapping windows. When you place two apps side by side, your brain stops wasting attention on locating windows or remembering where you left information moments earlier.

    There are several reasons split screen boosts productivity:

    • It reduces context switching by keeping both tasks visible.

    • It helps with visual comparison, which is far harder in single-window mode.

    • It reduces the mental load associated with window management.

    • It supports deep work by preventing accidental switching into unrelated apps.

    • It makes study sessions more efficient because notes and materials stay open simultaneously.

    • It helps with typing or transcription tasks where you reference one window while working in another.

    Because the human brain handles visual information far faster than hidden information, simply arranging your workspace more clearly improves your workflow without learning any new apps.

    How to Use Split Screen on Windows

    Windows provides one of the most flexible and mature implementations of split screen, commonly referred to as “Snap Assist,” allowing you to snap windows to halves, thirds, or even quadrants depending on what you need.

    Basic Drag-and-Snap Method

    1. Open the first app or window you want to use.

    2. Click and hold the title bar at the top.

    3. Drag the window to the far left or right edge until a translucent outline appears.

    4. Release the mouse, and the window will snap into that half of the screen.

    5. Windows automatically shows thumbnails of your remaining open apps.

    6. Click one to place it in the other half of the screen.

    Keyboard Shortcut Method

    • Press Windows + Left Arrow to snap a window to the left.

    • Press Windows + Right Arrow to snap a window to the right.

    • Use Windows + Up Arrow afterward to adjust into a corner quadrant.

    • Use Windows + Down Arrow to exit full or half-screen modes.

    Adjusting Split Sizes

    • Hover the mouse over the divider bar; a handle appears.

    • Drag left or right to change the portion each window occupies.

    Additional Windows Tips

    • Using Windows + Z (in newer versions) reveals layout grids, allowing you to choose 2, 3, or 4-window arrangements.

    • Turning on Snap Assist in Settings ensures Windows will guide you with visual cues.

    • If an app resizes awkwardly, maximize it once, then repeat split mode.

    Windows offers great flexibility, especially for multitasking-heavy workflows like spreadsheets, research, and document editing.

    How to Use Split Screen on macOS

    Apple’s split-screen system, often referred to as Split View, allows two apps to fill the screen without overlapping, creating a clean environment free of menu distractions.

    Method Using the Green Full-Screen Button

    1. Open the first app you want to use.

    2. Move your mouse to the top-left corner of that window.

    3. Hover over the green full-screen button without clicking.

    4. A small menu appears with options.

    5. Choose Tile Window to Left of Screen or Tile Window to Right of Screen.

    6. macOS shrinks the app into half the screen.

    7. Select the second app from the thumbnails along the opposite side.

    Resizing Split View

    • Drag the vertical divider between the two apps.

    • Hold down the Option key while dragging to create more granular resizing.

    Exiting Split View

    • Move your cursor to the top of the screen until the menu bar appears.

    • Click the green button again to exit.

    Touchpad Gestures That Help

    • Swipe up with three fingers to access Mission Control and choose another window.

    • Swipe left or right with four fingers to switch full-screen spaces.

    macOS Split View feels tidy and distraction-free, which is ideal for writers, students, and anyone who values a minimal visual environment.

    How to Use Split Screen on ChromeOS

    ChromeOS makes split screen extremely accessible, especially for students or Chromebook users working with tabs and apps simultaneously.

    Drag-and-Snap Method

    1. Open any window or Chrome app.

    2. Drag the title bar to the left until you see a shaded half-screen preview.

    3. Release to snap the window.

    4. Choose the second app or browser window from the remaining thumbnails.

    Shelf or Overview Mode Method

    1. Swipe up on the touchpad with three fingers to enter Overview Mode.

    2. Drag a window to the left or right area of the screen.

    3. Select the second app for the opposite side.

    Keyboard Shortcut

    • Press Alt + [ to snap left.

    • Press Alt + ] to snap right.

    ChromeOS is especially smooth for schoolwork because it handles split tabs as easily as split apps.

    How to Use Split Screen on iPadOS

    Many iPad users don’t realize their device can multitask well, yet iPadOS features one of the most intuitive split-screen systems once you understand the gestures.

    Using the Multitasking Menu

    1. Open the first app.

    2. Tap the three-dot multitasking icon at the top center.

    3. Choose the Split View icon.

    4. The app shifts aside, revealing the Home screen.

    5. Choose the second app to occupy the remaining space.

    Using the Dock

    1. Open the first app.

    2. Swipe up slightly from the bottom to reveal the Dock.

    3. Touch and hold the second app from the Dock.

    4. Drag it to the left or right edge until it locks into place.

    Adjusting Layout

    • Drag the divider bar to adjust width.

    • Slide the divider all the way to one side to exit split view.

    Bonus: Slide Over Mode

    If you want a floating window instead of a split window:

    • Drag an app from the Dock onto the screen without pushing it to the edge.

    • Move the floating window to either side for quick access.

    iPadOS is perfect for note-taking apps paired with reading material, online classes, drawing references, or side-by-side research.

    How to Use Split Screen on Android

    Android devices offer varying implementations depending on manufacturer, yet most modern phones and tablets include quick access to split-screen mode.

    Standard Android Method

    1. Open the first app.

    2. Tap the Recent Apps button or use the swipe-up gesture.

    3. Tap the app’s icon at the top of its preview.

    4. Select Split Screen (or a similar option depending on your device).

    5. Choose the second app from Recents or the Home screen.

    Adjusting Windows

    • Drag the divider up or down to change app size.

    • Drag the divider fully to exit split view.

    Manufacturer Variations

    • Samsung devices allow split screen through the Edge Panel.

    • Some phones include floating windows similar to Slide Over on tablets.

    Android split screen works well for messaging while browsing, watching a video while taking notes, or keeping a map open while reading directions.

    how to use split screen

    When Split Screen Helps the Most

    Using split screen becomes most useful when you’re juggling information or tasks that require visual comparison or side-by-side reference.

    Common Scenarios

    • Writing notes while watching an online lecture

    • Comparing two documents or spreadsheets

    • Dragging files between folders or apps

    • Responding to messages without losing your main workspace

    • Following tutorials while performing steps

    • Reading an article while drafting a summary

    • Copying citations or data between tabs

    • Monitoring charts while writing reports

    Split screen is essentially a productivity multiplier whenever two information sources need to remain visible simultaneously.

    Keyboard Shortcuts That Make Split Screen Faster Across Systems

    Although dragging works well, keyboard shortcuts dramatically speed up the workflow.

    Windows

    • Snap left: Windows + Left Arrow

    • Snap right: Windows + Right Arrow

    • Snap into a corner: Windows + Left/Right Arrow, then Up Arrow

    • Snap out: Windows + Down Arrow

    Mac

    While macOS lacks dedicated snap shortcuts, these help with window management:

    • Move window between monitors: Control + Left/Right Arrow

    • Enter full-screen: Control + Command + F

    ChromeOS

    • Snap left: Alt + [

    • Snap right: Alt + ]

    • Full-screen: F4 or Search + =

    iPadOS

    • App switcher gesture: swipe up and hold briefly

    • Dock gesture: swipe up slightly from bottom

    • Move apps: drag the three-dot icon

    Android

    • App switcher: swipe up and hold

    • Split screen: tap app icon > Split Screen

    Learning even one shortcut reduces friction significantly.

    Layout Templates for Better Multitasking

    Creating predictable layouts improves your focus, especially when you use split screen daily.

    Template for Students

    Left: Class video or reading material
    Right: Notes app or document editor

    Template for Office Work

    Left: Email or messaging app
    Right: Main work app (document, spreadsheet, or browser)

    Template for Researchers

    Left: Source article
    Right: Summary or outline document

    Template for Creatives

    Left: Reference images
    Right: Photoshop, drawing app, or writing tool

    Template for Admin Tasks

    Left: Calendar
    Right: To-do list or planning app

    Using templates avoids decision fatigue.

    A Repeatable Weekly Setup Routine for Split Screen

    Once a week, spending a few minutes adjusting your screen layout helps ensure your favorite workflows remain smooth.

    Weekly Split Screen Review

    1. Identify which tasks consumed the most screen switching.

    2. Decide which two-app pairs you use most often.

    3. Create dedicated desktop spaces or full-screen pairs.

    4. Clean unused browser tabs so split views look uncluttered.

    5. Group related apps in the Dock, Taskbar, or Shelf.

    6. Practice the necessary shortcuts once or twice.

    7. Reset your device layout to avoid visual clutter.

    This gentle review keeps your digital workspace aligned with your real workflow.

    Troubleshooting Split Screen Issues

    Even though split screen is simple, occasional issues can occur.

    If a window refuses to snap

    • Maximize the window, then try snapping again.

    • Some older apps do not support half-screen mode.

    • Update your operating system if snapping fails repeatedly.

    If apps resize strangely

    • Drag the divider slowly to reset proportions.

    • Close and reopen apps, then retry.

    If split screen exits unexpectedly

    • Check if full-screen mode interfered.

    • Restart the device if gestures malfunction temporarily.

    If an app cannot enter split view

    • Some mobile apps disable multitasking.

    • Try using the browser version instead.

    Troubleshooting becomes faster with experience.

    Final Thoughts

    Learning how to use split screen gives you an immediate productivity upgrade that requires no new apps, no subscriptions, and almost no learning curve once you practice the gestures and shortcuts a few times. Whether you are studying, working, organizing your life, writing long documents, comparing data, or simply trying to move between tasks with less mental strain, split screen transforms your device into a more organized workspace that mirrors the way your mind naturally processes information. With OS-specific steps, clear visuals, structured routines, and adaptable layout templates, this guide offers everything you need to multitask with greater ease and confidence.

  • Screen Time Limits That Stick

    Some days it feels like screens pull you in before you even notice.

    Modern life often pulls our attention toward screens from the moment we wake up until the minute we fall asleep, and whether you are a parent trying to model healthy habits for your children or a busy professional attempting to maintain focus while juggling work responsibilities with personal time, you probably know how challenging it can feel to create screen time boundaries that actually hold up for more than a few days.

    Many people try to cut back on screen use by relying on willpower alone, yet what usually happens is that after an exhausting day, the phone becomes the easiest form of relief, and the cycle repeats itself. That is why building screen time limits that stick requires not just intention but a practical system—one that accommodates real life, respects your energy levels, and helps your devices support your goals instead of working against them.

    This article walks you through a deeply structured approach to setting realistic screen time boundaries that last longer than a weekend experiment. You will learn how to configure built-in settings on your devices, how to use habit cues that make limits easier to follow, how to design an environment that quietly nudges you toward healthier choices, and how to run a gentle weekly review so your system stays adaptable as your circumstances shift. Throughout the guide, the tone remains supportive and non-judgmental, since the goal is not to eliminate screens but to bring your usage into alignment with the kind of life you want to live.

    Why Screen Time Limits Are Hard to Follow

    Many people blame themselves when they struggle to maintain balanced digital habits, but the truth is that modern technology is intentionally designed to hold attention, deliver constant stimulation, and create patterns that feel rewarding in the moment even when they leave you drained afterward. Understanding this helps you release personal guilt and shift toward structural solutions.

    Several factors make screen limits difficult:

    • Apps are engineered to encourage frequent checking.

    • Notifications interrupt focus even when you don’t open them.

    • Endless scrolling reduces the friction required to continue.

    • Stress, boredom, and fatigue make screens the easiest form of relief.

    • Families and workplaces often expect constant digital availability.

    Recognizing these challenges allows you to approach limits gently rather than forcing harsh rules that will quickly break.

    A Flexible Framework for Screen Time Limits That Stick

    Creating screen boundaries works best when you combine three layers:

    1. Device settings that automatically reduce temptation.

    2. Environmental cues that shift the context around your tech use.

    3. Habit changes that slowly reshape your routines without resistance.

    When these layers work together, the limits feel natural instead of punitive.

    Preparing Your Mindset Before You Start

    Before you dive into app restrictions or time cutbacks, grounding yourself mentally makes the entire process smoother.

    Helpful preparation principles

    • Treat screen limits as an experiment, not a strict rule.

    • Expect some days to be harder than others.

    • Focus on progress rather than perfection.

    • Allow your needs to change as your life changes.

    • Remember that limits exist to protect what matters most.

    Approaching this shift with compassion creates space for sustainable success.

    Step-by-Step Setup to Create Screen Time Limits That Stick

    The following method blends device configuration, routine design, and environment shaping. The entire process can be completed in about forty-five minutes.

    Step 1: Identify Your Biggest Screen-Time Friction Points

    Understanding where screen time gets out of control helps you design limits that attack the root cause.

    Common friction points

    • Mindless scrolling at night

    • Checking messages too frequently during work

    • Using screens immediately upon waking

    • Bouncing between apps to avoid difficult tasks

    • Letting autoplay turn short breaks into long distractions

    Questions to identify your patterns

    • When do I feel most drawn to my phone?

    • Which apps drain the most time without offering meaning?

    • What emotions lead me to reach for a screen?

    • When do screens enhance my life, and when do they reduce it?

    Clarity at this stage prevents random or unrealistic restrictions.

    Step 2: Build Your Personal Screen Time Limit Intentions

    Instead of declaring “I will use my phone less,” articulate specific patterns you want to shift.

    Try writing intentions like:

    • I want to create calmer mornings by delaying phone use.

    • I want to spend more evenings without endless scrolling.

    • I want to focus more deeply during work blocks.

    • I want to reduce the number of times I check email.

    • I want to spend more time on hobbies that bring me energy.

    Intentions anchor your decisions and give you a reason to follow the limits you set.

    Step 3: Configure Device Settings That Support Your Goals

    Most modern devices include built-in tools for reducing screen time, and these features work especially well when used in combination.

    Core restrictions to enable

    • Daily app limits

    • Focus modes or do-not-disturb intervals

    • Always-allowed app lists

    • Downtime schedules

    • Reduced notifications

    • Home screen organization by category

    Each restriction adds a layer of friction that helps slow impulsive behaviors.

    Examples of helpful settings

    • Setting social media limits for thirty minutes per day

    • Scheduling downtime one hour before bed

    • Allowing only essential apps during work hours

    • Muting nonurgent notifications

    • Hiding apps that encourage scrolling

    These settings work quietly in the background, supporting your overall goals.

    Step 4: Design Environmental Cues That Make Limits Easier to Follow

    Environment shapes behavior more powerfully than motivation. Adjusting your physical surroundings makes screen limits feel intuitive instead of forced.

    Effective environmental shifts

    • Keep your phone in another room during meals.

    • Charge your devices outside the bedroom.

    • Use a physical alarm clock instead of your phone.

    • Create screen-free zones such as the kitchen or desk.

    • Place a book or notebook in the areas where you typically scroll.

    Small physical changes can produce dramatic behavior changes.

    Step 5: Build Gentle Habit Cues That Replace Automatic Screen Use

    Most screen time happens without conscious thought, so creating alternate routines helps redirect your impulses.

    Substitution habits

    1. When you feel the urge to scroll, drink a glass of water first.

    2. When you sit down after work, stretch for one minute before touching your phone.

    3. When you wake up, open your curtains before opening any app.

    4. When you take a break, walk for thirty seconds before checking messages.

    Mini habits that reduce screen pull

    • Place your phone face down whenever you set it down.

    • Keep a small fidget object nearby to occupy restless hands.

    • Practice five slow breaths before unlocking your phone.

    Replacing the trigger behaviors keeps you from falling into old patterns.

    Step 6: Create a Daily Rhythm That Supports Digital Balance

    Your daily structure influences how effective your screen limits become.

    Helpful rhythm anchors

    • A morning routine without screens

    • Dedicated work blocks supported by focus modes

    • Scheduled check-in periods for messages

    • A post-work transition routine

    • A bedtime ritual that excludes screens

    Consistent rhythms reduce decision fatigue and make boundaries easier to maintain.

    Step 7: Track Your Screen Time Gently

    Monitoring progress gives insight, but it must be done without judgment.

    Simple ways to track

    • View weekly screen reports on your device

    • Note one observation per day in a notebook

    • Track which habits helped most

    • Pay attention to emotional patterns

    You do not need perfect data; you only need enough information to adjust your plan.

    A Weekly Review Template for Screen Time Limits That Stick

    Running a short weekly check-in helps you refine your system so it evolves with your needs.

    10-Minute Screen Time Review

    1. Check your weekly screen report.

    2. Identify your highest-use apps.

    3. Note what worked well.

    4. Note what felt difficult or unrealistic.

    5. Adjust app limits if needed.

    6. Revisit intentions and rewrite them if your week changed.

    7. Plan one environmental tweak for next week.

    8. Choose one habit cue to strengthen.

    9. Set a new focus mode schedule if necessary.

    10. Celebrate any progress, no matter how small.

    Weekly reflection keeps your efforts grounded without pressure.

    screen time limits that stick
    Example: A Realistic Screen Time Limit Plan for a Busy Parent

    Below is a scenario to illustrate how flexible screen time limits might look in real life.

    Morning

    • Phone stays outside the bedroom.

    • No apps until breakfast is finished.

    • Quick check-in before work starts.

    Workday

    • Focus mode blocks social apps from 9–12 and 1–4.

    • Messages checked at lunch and mid-afternoon.

    • Email checked three times daily.

    Evening

    • One hour of free screen time after dinner.

    • Limit scrolling to one app.

    • Downtime begins one hour before bed.

    Weekend

    • Longer optional screen sessions but with device-free family blocks.

    • One morning each weekend is intentionally offline.

    This structure is gentle yet effective.

    Example: A Plan for a Professional Seeking More Focus

    Morning

    • Start with a short walk instead of checking messages.

    • Keep notifications muted until the first work block begins.

    Workday

    • Use two 90-minute deep work blocks supported by focus modes.

    • Hide distracting apps from the home screen using folders.

    • Create a 3-minute reset routine after each block.

    Evening

    • Identify one low-screen activity to unwind.

    • Use app limits to prevent late-night email checking.

    • Charge phone in another room overnight.

    A focus-driven user benefits from strong boundaries around work and rest.

    When to Reevaluate Your Screen Time Limits

    Review your system whenever circumstances shift significantly.

    Moments that call for reevaluation

    • Starting a new job

    • Entering a demanding season at work

    • Adjusting children’s schedules

    • Moving, traveling, or changing routines

    • Experiencing stress or energy changes

    Flexibility ensures your screen time habits support your life instead of restricting it.

    Indicators That Your Limits Are Working

    Several subtle signs reveal that your approach is paying off:

    • Mornings feel calmer.

    • Work sessions feel more focused.

    • Evenings feel less rushed.

    • Scroll sessions feel intentional rather than automatic.

    • Notifications feel less stressful.

    • You feel more present in conversations.

    • You spend more time on activities you enjoy.

    Progress often appears in small shifts before larger changes emerge.

    Final Thoughts

    Creating screen time limits that stick is not about removing technology from your life; it is about shaping your digital environment so it supports your wellbeing, focus, and relationships. By combining gentle device settings, smart environmental cues, flexible habit changes, and a simple weekly review routine, you build a system that helps you stay grounded without feeling restricted. Over time, these small shifts accumulate into a more present, intentional rhythm that makes space for deeper focus, more restorative rest, and clearer boundaries in a world filled with constant digital pull.

  • Weekly Review Routine Template

    Anyone who has ever reached Friday evening feeling as though the entire week passed in a blur, with tasks half-finished, projects scattered across different apps, and small obligations forgotten until the last minute, knows exactly how draining it can feel to operate without a stable rhythm that keeps work under control.

    Establishing a dependable weekly review routine template gives you a simple, repeatable way to pause, look at your commitments with clarity, and decide what deserves your attention next, rather than reacting to whatever notification or request appears first. This ritual does not need to be complicated; in fact, it works best when the steps remain almost identical every week, because repetition helps your mind settle into a mode of calm oversight, where reviewing becomes an anchor rather than an extra task to think about.

    The goal of a weekly review is straightforward: create one moment each week where you step out of task mode and into thinking mode, giving yourself enough space to reset cluttered thoughts, bring scattered responsibilities back into a single place, and choose the priorities that truly matter. A good weekly review takes about thirty minutes when you follow a structured flow, and that small investment pays back hours of regained focus, fewer mistakes, and a stronger sense of direction. This guide offers a full template, a reliable checklist, visual examples, timing instructions, and an explanation of how a consistent weekly review strengthens your productivity system over time.

    Why a Weekly Review Matters More Than You Expect

    Many people assume they simply need better tools or better discipline, yet in reality what they need most is a reliable checkpoint that ties the entire system together. Even the best apps fail if you never look back at what they contain, and even strong habits slowly lose shape without a moment of review. The weekly review fills this gap, acting as a quiet reset button that returns clarity to your workflow.

    The weekly review works because:

    • It prevents silent task buildup that causes stress later.

    • It creates a dedicated space for strategic thinking.

    • It reduces the sense of being behind.

    • It helps you plan realistically rather than optimistically.

    • It strengthens your awareness of ongoing projects.

    • It builds trust in your system, not in your memory.

    When done regularly, a weekly review routine template becomes a stabilizing force that keeps the rest of your productivity practices grounded.

    Setting Up Your Space Before You Start

    Before diving into the steps, prepare your environment so you avoid distractions during the review. A weekly review is far more effective when you enter it with a sense of calm and intentionality.

    Steps to Prepare Your Environment

    1. Choose a quiet place where you can think clearly.

    2. Set a gentle timer for thirty minutes so you maintain focus.

    3. Place your devices face-down or in do-not-disturb mode.

    4. Gather the tools you need: notebook, phone, laptop, planner.

    5. Keep a glass of water or tea nearby to stay relaxed.

    Mental Preparation Cues

    • Remind yourself that this is not a time for doing tasks; it is a time for reviewing them.

    • Approach the review with curiosity rather than stress.

    • Treat this as a gift you give yourself, not a chore you owe to others.

    Preparing both your physical and mental space ensures the review feels like a reset instead of another obligation.

    The Core Weekly Review Routine Template (Full 30-Minute Flow)

    Below is the complete flow, designed to be calm, logical, and repeatable. Each step contains detailed actions and cues to help guide your thinking.

    Step 1: Capture Everything (5 Minutes)

    Start by gathering all loose pieces of your week—scattered tasks, ideas, commitments, and reminders—so they exit your mind and enter a trusted place.

    What to Capture

    • Emails you flagged but never processed.

    • Messages you marked “unread” to revisit.

    • Notes on your phone.

    • Paper scraps or sticky notes.

    • Thoughts that came to mind but weren’t documented.

    Prompts to Help You Capture More

    • What did I say I would do but haven’t logged yet?

    • What is bothering me mentally that I haven’t written down?

    • What small responsibilities did I avoid even though they take two minutes?

    This step clears your mind and ensures nothing important slips away.

    Step 2: Clear Your Digital and Physical Inboxes (5 Minutes)

    Your inbox here means anything that collects unprocessed information—email, messaging apps, download folders, notebooks, or work tools.

    Actions

    1. Archive or delete messages that no longer need attention.

    2. Move tasks from emails into your task manager.

    3. Sort downloads and clear your desktop.

    4. File notes into the appropriate folder or app.

    Purpose of This Step

    This is not about reorganizing everything perfectly; it is about eliminating clutter that builds up quietly. Clearing inboxes makes room for better planning.

    Step 3: Review Your Calendar (5 Minutes)

    Calendar review gives structure to upcoming decisions by showing what is already fixed and what remains flexible.

    Look Back at the Past Week

    • Meetings completed

    • Deadlines met or missed

    • Events that created new tasks

    • Notes or follow-ups you forgot to log

    Then Look Ahead

    • Scheduled meetings in the next two weeks

    • Time-sensitive responsibilities

    • Appointments requiring preparation

    • Potential conflicts in timing

    Calendar review ensures your plan aligns with reality rather than assumptions.

    Step 4: Review Tasks, Projects, and Priorities (10 Minutes)

    This is the heart of the weekly review—the moment where you examine your commitments and choose what matters most.

    Tasks

    • Mark completed tasks as done.

    • Delete those no longer relevant.

    • Rewrite confusing tasks into clearer language.

    • Group related items so the next steps become obvious.

    Projects

    • Check project progress.

    • Identify what is stuck and why.

    • Note the next physical action for each project.

    • Decide which projects deserve focus next week.

    Priorities

    • Choose three main outcomes you want to achieve next week.

    • Ensure these match available time and energy.

    • Remove priorities that no longer align with goals.

    This step transforms scattered data into an intentional plan.

    Step 5: Build Your Weekly Plan (5 Minutes)

    After reviewing tasks and projects, convert the insights into a simple, pragmatic plan.

    Build a Weekly Plan with Clear Structure

    • Identify the top three priorities for the week.

    • Assign each priority a “focus day.”

    • Block two or three windows of deep work.

    • Allocate time for recurring admin tasks.

    • Add buffer time for unexpected events.

    Why This Works

    A weekly plan does not need to predict everything; it simply gives shape to your intentions and reduces decision fatigue.

    A Simple Weekly Review Routine Template You Can Copy

    Below is a streamlined version you can use every week:

    Weekly Review Template

    1. Capture: Gather tasks, ideas, messages, notes.

    2. Clear: Empty inboxes, reset downloads, file notes.

    3. Reflect: Review last week’s wins, challenges, and unfinished tasks.

    4. Check Calendar: Look backward and forward two weeks.

    5. Review Projects: Identify next steps and remove outdated items.

    6. Prioritize: Choose your three main goals for the coming week.

    7. Plan: Add focus days, time blocks, and buffers.

    8. Reset Workspace: Tidy your desk or digital environment.

    Using the same flow every week builds rhythm and mental clarity.

    A Detailed Checklist for Quick Reference

    This checklist helps you complete reviews more quickly over time:

    Quick Checklist

    • Did I capture everything unfinished or unlogged?

    • Did I clear all inboxes?

    • Did I review last week’s calendar for forgotten tasks?

    • Did I verify upcoming events and deadlines?

    • Did I identify stalled projects?

    • Did I decide the three weekly priorities?

    • Did I create a realistic weekly plan?

    • Did I tidy my workspace for a fresh start?

    Repeating this list makes the process feel natural.

    Reflection Prompts That Build Insight

    Reflection improves self-awareness and helps you work more intentionally.

    Prompts for Weekly Reflection

    • What worked especially well this week, and why?

    • What drained more energy than expected?

    • What patterns do I notice in my distractions?

    • What small wins am I proud of?

    • What obligations can be delegated or postponed?

    • What would next week look like if it went perfectly?

    These prompts help expand your thinking beyond tasks into broader patterns.

    weekly review routine template

    A Sample 30-Minute Weekly Review Agenda

    You can follow this agenda as-is for a predictable, calm review experience.

    Minute-by-Minute Agenda

    1–5 minutes: Capture everything
    6–10 minutes: Clear inboxes
    11–15 minutes: Review calendar
    16–25 minutes: Review tasks and projects
    26–28 minutes: Define top three priorities
    29–30 minutes: Plan next week + tidy workspace

    This agenda keeps the session focused and efficient.

    How to Make the Weekly Review Feel Calmer

    Many people avoid reviews because they feel stressful. With small adjustments, you can make this ritual pleasantly reflective.

    Ways to Calm the Experience

    • Play quiet background music.

    • Brew tea or coffee before starting.

    • Use a warm light instead of bright overhead lighting.

    • Start with deep breaths to slow your pace.

    • Remind yourself this is not judgment—only insight.

    Calmness allows for clearer thinking and better planning.

    How Technology Supports Your Review (Without Distraction)

    Technology can help if used deliberately.

    Suggested Digital Tools

    • A notes app for capturing ideas

    • A calendar app for events

    • A simple task manager

    • A digital document for storing your template

    Safety Notes for Digital Organization

    • Back up important files.

    • Store sensitive tasks in secure apps.

    • Avoid adding too many tools at once.

    • Keep systems simple to reduce friction.

    Your tools should support, not overwhelm, your routine.

    When to Do Your Weekly Review

    Timing influences effectiveness.

    Best Times

    • Friday afternoon (ideal for closing the week)

    • Sunday evening (sets up Monday smoothly)

    • Monday morning (clear reset at the start)

    What Matters Most

    Consistency matters more than timing. Choose a window you can protect.

    How the Weekly Review Strengthens Long-Term Productivity

    A good weekly review habit builds deep benefits:

    • Better awareness of commitments

    • Fewer forgotten tasks

    • More realistic planning

    • Reduced stress from mental clutter

    • Increased trust in your system

    • Stronger alignment with long-term goals

    Over time, the quality of your days increases significantly.

    Final Thoughts

    Building a dependable weekly review routine template gives you a central anchor that keeps your entire productivity system alive, because it reconnects you with your commitments, clarifies your priorities, and allows you to adjust your plans intentionally rather than reactively. Once this routine becomes a habit, your workflow feels smoother, your weeks feel more predictable, and your mind feels lighter.